Tuesday, December 31

A Year In Review

As the last minutes of the decade tick down, I thought I'd share some of my favourite cards from this year. I hope you'll also take some time to post a review of the projects you enjoyed creating in 2019. Please don't forget to share a link in the comment section below so we can visit!

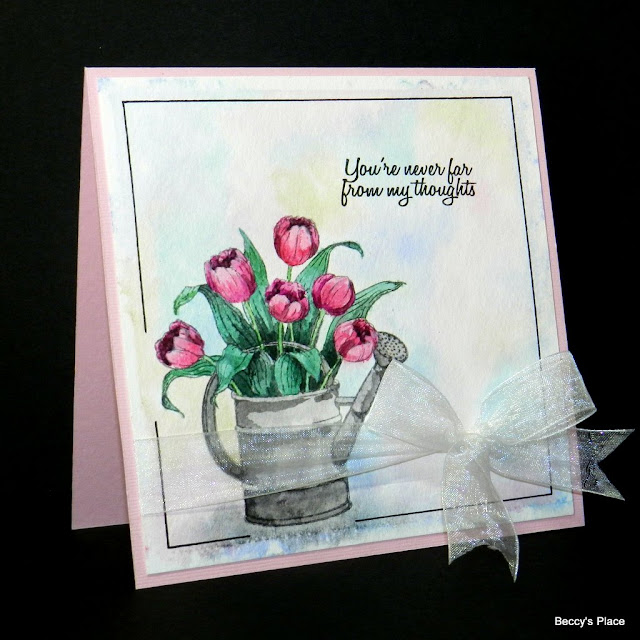
JANUARY - Spring Tulips

FEBRUARY - Happy Wanderers

MARCH - Burger and Fries

APRIL - Poultry in Motion

MAY - Lakeside

JUNE - Eucalyptus

JULY - Button Collector

AUGUST - Welcome Home

SEPTEMBER - Cottage Garden

OCTOBER - Sing Joy

NOVEMBER - Poinsettia

DECEMBER - Girls' Night

Here's to an awesome 2020!

Sunday, December 29

Happy Hour

To make the background for this card, I started by colouring with very light-coloured alcohol markers in patches around the uncoloured image. The splotchy effect is cause by dripping blending solution straight from the bottle onto the coloured card. 


Stamps:

Friday, December 27

Party Time!

Tropical beaches and balmy breezes, cocktails on the terrace... ahhh, that's the life for me.


This background was created by stippling colour with the tip of the brush marker, starting with the darkest colours and working into the lightest as you move further out from the image. Don't forget to add the shadow under the image to help give it some weight and anchor it to the ground.

Stamps:

Thursday, December 26


Selected, retired digital stamps at an incredibly low price for just 48 hours.
No rainchecks. No repeats.

Wednesday, December 25

Monday, December 23

Bring on the Bubbly!

It's girls' night all week at my place, and that means fancy cocktails with pretty decorated glasses...
which really means card stock, markers and a set of stamps! 


Stamps:

Saturday, December 21

Something Frosty

At this time of year in Australia, we look forward to something frosty at the end of a long, hot day. Whether a frozen softdrink, chilled juice, icy cold beer or a fabulous frosty cocktail complete with sweet, fresh strawberries... as long as it's good and cold.


I created the background with light-coloured alcohol markers in the same colour families as the ones I used for the image. Blending solution helped to give a mottled look where the different colours meet and blend.

Stamps:

Thursday, December 19

Kathy's Odd Bods


We're headed to Kathy's place today to meet some odd little critters featured on her latest projects. 
Her first card has been decorated both on the front, with a pink-cheeked elephant, and inside where you'll find a little mouse reluctant to grow up! Kathy has used two of the sentiments from the Odd Bods set to complete her card.


This second card features the odd sheep from the same set of digital stamps. Kathy printed it several times so she could build up the image to give it a 3D look. She also embossed some texture into the sheep's wool for a fabulous curly look!


Wednesday, December 18

Tuesday, December 17

Happy Hour with Anesha


Anesha is our fabulous host today, with drinks for all her besties.
She has created two wonderful cards using the Girls' Night set of digital stamps. The first one is all about the sparkles... from bubbly champagne to a glittering background. Who wouldn't feel fabulous receiving this?!


Anesha's second card is all about relaxation and life in the slow lane. It brings to mind balmy summer days lounging by the pool with palm trees swaying gently in the breeze. I'm thinking white sand beaches, the scent of tropical flowers and a full day of doing nothing in particular.


For more of Anesha's fabulous work, visit her blog:

Sunday, December 15

Everything Papercraft - Quilling

Quilling, also known as paper filigree, is a handcraft that involves the use of paper strips that are rolled, shaped and glued together to form decorative patterns. The term “quilling” comes from the practice of winding the strips of paper around a quill to form the basic coil shape, which are then arranged to make flowers, foliage and decorative patterns. Some quilled pieces are extremely intricate and involve many hours of work to complete.

Quilling is popular all around the world due to the low cost of materials – it was originally done with paper trimmed from the gilded edges of books – as well as the beauty of the three dimensional pieces that are created with the paper strips. These days it’s often seen on wedding invitations, decorated boxes, scrapbook pages and even jewellery. 

(image courtesy of Margie Sheetz @quilladelphia_pa)

Friday, December 13

Odd Little Elephant

I wanted to give the little elephant from the new Odd Bods set a little more love, so I printed the line drawing and adding a couple of stitched hearts. Since I was using alcohol markers to colour, I made sure to use a water based black pen rather than oil or solvent.


Stamps:


Wednesday, December 11

My Favourite

The star of today's card is one of the quirky critters from the new Odd Bods digital stamp set.
I've coloured him with pencils on slightly textured card stock, which gives him a fuzzy look.


Stamps:

Tuesday, December 10

Hot Tip Tuesday


You don't always have to spend lots of time colouring to get great images for your cards, scrapbook pages and paper craft projects. For a fabulous, consistent look, try stamping directly onto coloured card and then add some highlights and shadows with pencil. As you can see in the photo below, I've also used a gold pen for some extra colour and shine.


Stamps:

Sunday, December 8

Karin's Critters


Karin has created two fabulous cards using images from the new Odd Bods set of digital stamps. The first is a comical Christmas card with the little mouse and his attempt to decorate for the holidays. Karin altered a bauble image to look as though it cracked open like an egg. The expression on the mouse's face really says it all.


Her second card uses lots of bright and happy colours, fabulous textures and interesting shapes. What a great birthday card this would make for someone special.


Friday, December 6

Tutorial - Secret Message Cards


An innocent looking gatefold card with a pretty woven centre... but when you know the trick, you can discover the hidden secrets of the fabulous Secret Message Card!


1. You'll need one piece of card stock measuring 6" x 8" and two pieces measuring 6" x 2".


2. Place the 6" x 8" piece of card stock horizontally on your score board and score at 2", 4" and 6".


3. Fold back and forth along each score line so that you have plenty of movement in each fold.


4. Fold in half along the 4" score line.


5. Using a trimmer or craft knife and ruler, cut horizontally from the centre fold to the score line in 11/2" increments, ensuring you cut through both layers of card stock. Your cuts will measure 11/2", 3" and 41/2" from the top of the card.


6. Open the card. The cuts you made should be evenly spaced in the centre section, as in the photo below.


7. The two 6" x 2" pieces of card stock are woven through the cuts in the centre of the card. I found it necessary to slice off a tiny slither from the long edge of each piece so they would fit comfortably side by side.


8. Fold the card along each vertical fold line as shown in the photos below. Use a bone folder to reinforce the creases.


9. The mechanism works by squeezing the centre section together and then separating the two sides. See the photo sequence below.


10. This is the location for your secret message! I have stamped sentiments on each of the "hidden" squares. You could add a little picture or flat embellishment if you prefer.


11. When the centre is closed again, the words disappear like magic! It's fun to watch people try to figure out how it works and what became of the words they just saw.


12. Decorate the front of the card as desired. I added an image and sentiment as well as some patterned paper and hand doodling for a border.


13. Below is a back view of the card, as you can see, the sentiment is not visible from either side until the centre mechanism is folded correctly.