Today I want to show you a fun way to use the large stamp from the new Cosmos clear stamp set. I've designed this particular image so that it can be used in any orientation, and for this card, I'll be using it horizontally with the flowers facing downward.

1. Start by choosing your colours. I'm using a black base card for a strong contrast with the orange and yellow pencils and the gold embossing powder.


2. Stamp and heat emboss the large cosmos image along the bottom edge of the A5 card. I used gold embossing powder, but you can use any colour you wish.


3. Colour the flowers with a base layer of white pencil. This will help make the other colours more vibrant against the dark background.

4. Add some extra white pencil to the middle of each petal to create a highlight. The light areas will appear closer to the viewer, while the dark areas on either end will recede. This gives the petals shape.

5. Colour over the entire petal with a layer of your lightest colour, in my case, yellow. You can see how the extra white pencil has created a lighter area - a highlight.

6. Use your darkest colour at the base of petal, where it grows out from the centre of the flower, and at the tip of the petal. I'm using red, not only because it's darker, but also because I want my flowers to be variegated.

7. Now bring in your middle colour, which for me is orange, and add it between the yellow and red.

8. Colour over the entire petal again with your lightest colour to blend everything together. (If you prefer, you can use a blending pencil)

9. The centre of the flower is coloured in the same way. Add some extra white pencil to the highlight areas, which is in the very centre, and then colour over the top with your lightest colour.

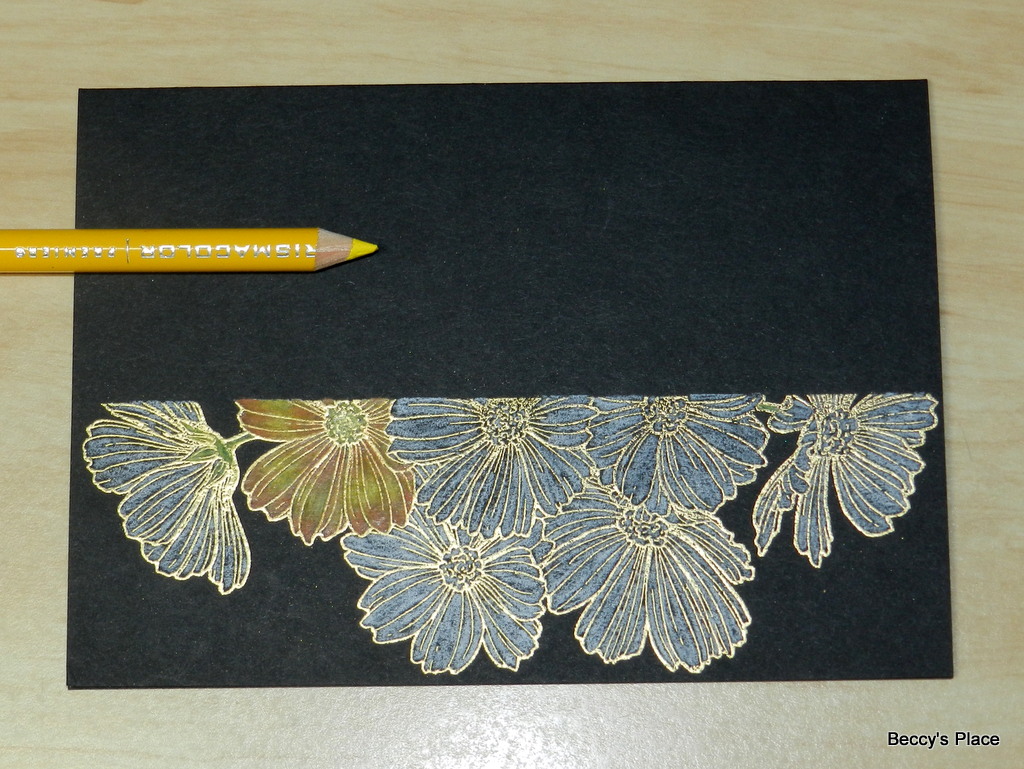
10. Add some darker pencil around the outer edge, and blend with the lighter colour again.

11. Repeat the process for all the flowers.

12. If desired, you can darken some of the shadow areas with a very dark grey or black pencil. These would be the spaces where one flower tucks behind another, or where the petals cross over each other. Take care not to apply too much pressure to the pencil, you want to gently build up the colour.

13. Now do the same with the white pencil, concentrating on the highlight areas. Again, be gentle with the colour, you want it lighter, but not white.

14. Once you've finished colouring, use a pair of small, sharp scissors to cut through both layers of the card leaving a small border of cardstock around the edges of the image.

15. Emboss a strip of gold cardstock with a simple sentiment and attach it along the top of the flowers. Trim the ends to fit the card.

16. Scatter some rhinestones around for a little extra sparkle.

Products: