Friday, April 30

Encore Set - Keeping It Simple


This month's old favourite is the Keeping It Simple set of digital stamps. Sweet and simple little flowers with a variety of mix and match sentiments for different occasions. Judy and Karin have revisited the set to create some new inspiration.

digital stamps

Thursday, April 29


Selected, retired digital stamps at an incredibly low price for just 48 hours.
No rainchecks. No repeats.

Beautiful Friendship
digital stamp set

Monday, April 26

Last Days...

We have a long list of digital stamps heading to permanent retirement from the store.
Don't forget to head over and grab a bargain before they're gone!
SALE ends April 30th

Friday, April 23

Judy's Card Creations


A fiery sunset and a calm blue sea is the perfect backdrop for the palm tree image from our new Tree Scapes set of digital stamps. Judy has used a variety of inks to add lots of fabulous colour into the background of her card, which contrasts perfectly with the dark silhouette.


Her second card is the picture of elegance with a black and white colour scheme, geometric paper and round enamel dots. 


Wednesday, April 21

Love You Mum

This cute little bear would work for many different occasions, but he's extra cute on cards and projects for Mother's Day. Loaded up with gifts and flowers he's all ready to show his Mama how much he loves her!


Stamps:

Monday, April 19

The Forest At Night


The pine trees from the Tree Scapes set make the perfect foreground for a beautiful night sky. I started by printing the image multiple times at various sizes and orientations to create a forest. After all the colouring was done, I added a little more ground to complete the scene.


Click on the link below to head over to the Beccy's Place YouTube
channel to watch see how the night sky was coloured:


Stamps:

Saturday, April 17

Karin's Creations


Karin has created a fabulous side step card featuring the palm trees from the new Tree Scapes digital set. The pretty purple and blue paper she used creates the perfect backdrop for a balmy tropical island. In contrast, her second card is set in a snowy wonderland complete with snowman and towering pine trees.


Thursday, April 15

Everything Papercraft - Iris Folding


Iris folding is a paper craft technique that is believed to have its origins in Holland sometime in the 1900s. It involves the arrangement of folded paper strips into spiral designs that resemble the iris diaphragm of a camera, which is where the name originated. The designs are decorative and generally used on card fronts or as embellishments for scrapbook and journal pages.

Traditionally, Dutch crafters sourced their papers from envelopes with pretty, patterned interiors, but these days, crafters use all sorts of light decorative paper, from origami sheets to upcycled coffee filters.

Iris folding patterns can be purchased on-line, in some specialty art stores or as published books. Many paper craft artists create their own unique designs.

There is often confusion between iris folding, which primarily focuses on the creation of an iris, and tea bag folding, which is more about pattern and symmetry. Both however, use similar types of folded paper with a similar technique for placement.

Image: Internet

Tuesday, April 13

Hot Tip Tuesday


Chipboard
Don't let this fabulous material end up in the bin! Harvest chipboard pieces from packaging, books and boxes and use the large, intact pieces to create mini album and journal covers. The smaller pieces are great for die cutting embellishments - providing the material isn't too thick - while the tiniest pieces of chipboard are an excellent alternative to foam tape. Just add glue and sandwich between the surface of your project and the embellishment or image you want to pop-up. It's inexpensive, does a great job, and best of all, reduces waste.

Monday, April 12

Easter With Deanne


I must apologise to you all, and especially to Deanne,
for forgetting to post her fabulous Easter card last month. 


As you can see, she has cleverly pieced the little scarf with the same paper that was used in the background of the card. By slightly offsetting the stripes and colours, it coordinates perfectly without getting lost. She also added some Glossy Accents to the bunny's glasses to give the impression of shiny glass lenses.
You can see more of Deanne's wonderful cards and papercraft projects by clicking the link below and heading over to her personal blog.

Tutorial - Lever Fold Card


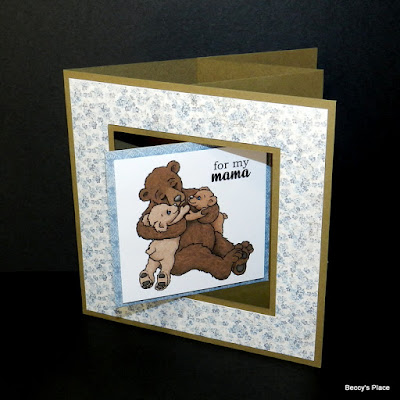
This is one of those fabulous cards that gives you lots of bang for your buck! Although it looks somewhat complicated, and includes a clever lever action in the front, it's actually very easy to put together and folds nice and flat for postage. Yep, it's one of those great cards that really has it all!


TEMPLATE:

1. To create a card the same size as I have, you'll need two pieces of card stock measuring 5" x 10". Place one of the pieces of card stock horizontally on your score board and score at 5". Fold the card along the score line to form the card blank.


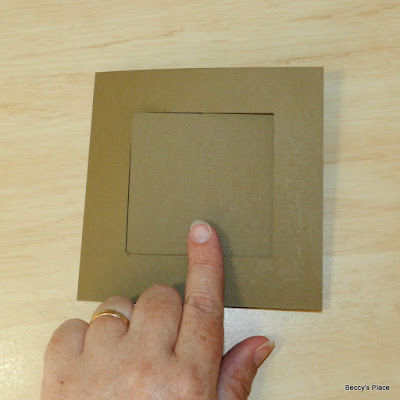
2. Cut a 3" square window in the centre front of the card blank. The window will be 1" from the top, bottom and sides. Refer to the template above for correct placement. Set the card blank aside.


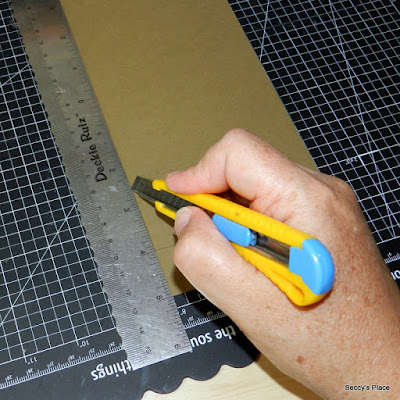
3. To create the inner piece, place the second piece of card stock horizontally on your cutting mat and make a 3" cut down the left hand side, starting 1" from the top and 1" from the side. The cut should stop 1" from the bottom. Turn the card 90 degrees and make a 11/2" cut starting from one end of the first cut line. It should stop at 21/2". Make another 11/2" cut from the other end of the first cut line, also stopping at 21/2". See the template above and the photos below for correct placement.


4. Place the inner piece horizontally on your score board with the cut end on the left hand side. Score at 21/2", starting from the top of the card and ending at the cut. Score another line at 21/2", this time starting from the bottom of the card and stopping at the bottom cut. Refer to the template for correct placement.


5. Fold along the score lines beginning with a valley fold, followed by a mountain fold and then another valley. See the image below.


6. Now it's time to join the card blank and the inner piece together to form the card base.


7. Fold the first section of the inner piece back and apply some liquid glue.


8. Open the card blank and place the inner piece over the top. Carefully line up all the edges and adhere the inner piece to the card blank. Allow to dry.


9. Fold back the other end of the inner piece and apply more liquid glue. Line up the edges and adhere in place to form the card base.


10. To decorate, close the card and work on the 3" square in the centre. This area is on the "lever" portion of the card and will be visible from both the inside and outside of the card. Take care not to place anything over the edges or you may obstruct the lever action.


Once you understand how the card works it's quite simple to alter the size to suit your needs. Just make sure the two pieces of card stock are the same size and that the measurements for the window in the card base are the same as the cuts for the inner piece.


Stamps:

Saturday, April 10

Judy's Projects


Judy is sharing two adorable cards she created with the My Mama set of digital stamps. Both images are beautifully coloured with Prismacolor pencils and then layered on pretty papers and card stock. She even created her own little floral embellishment by printing, colouring and fussy cutting the tiny flowers from one of the other images in the set. Cute!