Saturday, February 27

Encore Set - The Three Tenors


Remember these yowling kitties? They are the featured Encore Set for February and have been used by Anesha and Jackie to create some fun new projects that are sure to bring a smile to someone's face!

The Three Tenors
digital stamps


Thursday, February 25


Selected, retired digital stamps at an incredibly low price for just 48 hours.
No rainchecks. No repeats.

Feather Set
digital stamps

Wednesday, February 24

A Little Something


You don't always need expensive mediums to colour your cards. In this video tutorial, I demonstrate how simple it is to use children's markers to get a great water-colour look:


Stamps:

Tuesday, February 23

A Visit With Jackie


Jackie has potted up some pretty flowers using the new A Little Something set of digital stamps. She layered the florals in her first two cards to create pots bursting with pretty blooms. She also created pretty boxes to hold her handmade cards, which would make a beautiful gift for someone special.


Sunday, February 21

Lots of Watercolour

Stamping and colouring with water-based inks is a quick and easy way to create great cards. You can use any brand of ink, paint or marker to stamp providing it's water based, which you can check by reading the label on the back of the product or packaging. Use the same ink to colour the stamped image by stamping some ink onto an acrylic block, non-stick mat or other non-porous surface, and picking it up with a water brush. Add layers of colour for darker and more intense shadow areas.


Stamps:

Friday, February 19

Fun Times with Anesha


Anesha's Good Friends projects are all about fabulous colour, and lots of it! Check out the beautiful backgrounds and the funky hair colour she's given these ladies... oh what fun!


Wednesday, February 17

Slimline Cards

It's so easy to create fabulous slimline cards using all the flower images from the new "A Little Something" set of clear stamps. I used distress inks to both stamp and colour each image, which is a quick and easy technique that gives great results.


Stamps:


Tuesday, February 16

The Basics of Colouring IV


The final video is a complete colouring project. You can download the image and the colouring guide by following the link on the YouTube page.

Monday, February 15

Everything Papercraft - Glue


Despite the many and varied brands of glue on the market, they really boil down to just five basic types – water-based glue, solvent based glue, animal glue, two-part glue and cyanoacrylate glue, which is better known as super glue. Most papercraft glue falls into the water or solvent based categories, but there are crafters who prefer other glues depending on the materials being used and what the project is for.

Despite being used interchangeably, the words glue and adhesive have quite distinct meanings – glues are substances that have natural origins while adhesives are synthetic. Technically, hot glue guns deliver liquid polymer, a synthetic product, and would therefore more appropriately be called hot adhesive guns… but let’s not split hairs!

When choosing a glue, it’s important to carefully read the label to determine if the product is suitable for the intended project – does it hold up to wear and tear; is it toxic; and what are the clean up requirements? It’s a good idea to test glue on scraps from your project, particularly fabrics and ribbon which will sometimes discolour when glue is applied. Ask other crafters about their preferred product and don’t be shy about requesting information from retailers and demonstrators.

Saturday, February 13

Tutorial - Flower Pot Easel Card


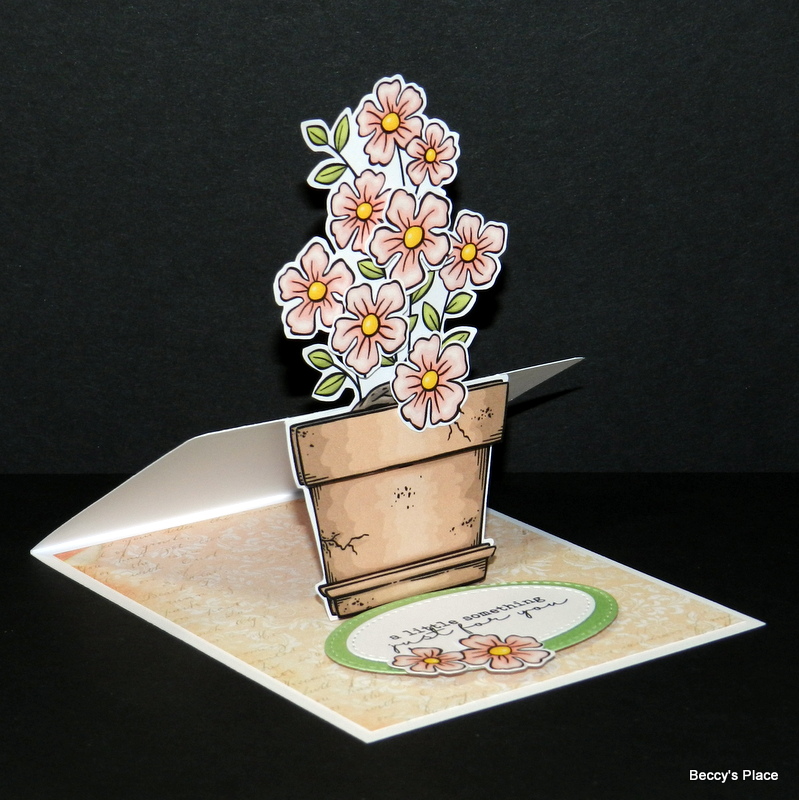
Generally, Flower Pot easel cards are created by cutting a flower pot shape from card stock and securing it to the front section of an easel card. Although I've used the same general technique, instead of cutting a flower pot shape, I've used a pre-coloured digital image of a flower pot from the new set "A Little Something".


1. I started by opening the images and a sentiment in MSWord, a simple program that's familiar to most people. I set the pot height to 13/4", which will be the height of my "easel", and resized the flowers so they fit nicely with the pot. As you can see below, I also printed an extra pot and flower image at the same size, which will be used to add a little dimension to the finished card.


2. Fussy cut around the main flower pot image. Measure the height of your pot, which will be the first score line you make on your card blank. Mine is 13/4".


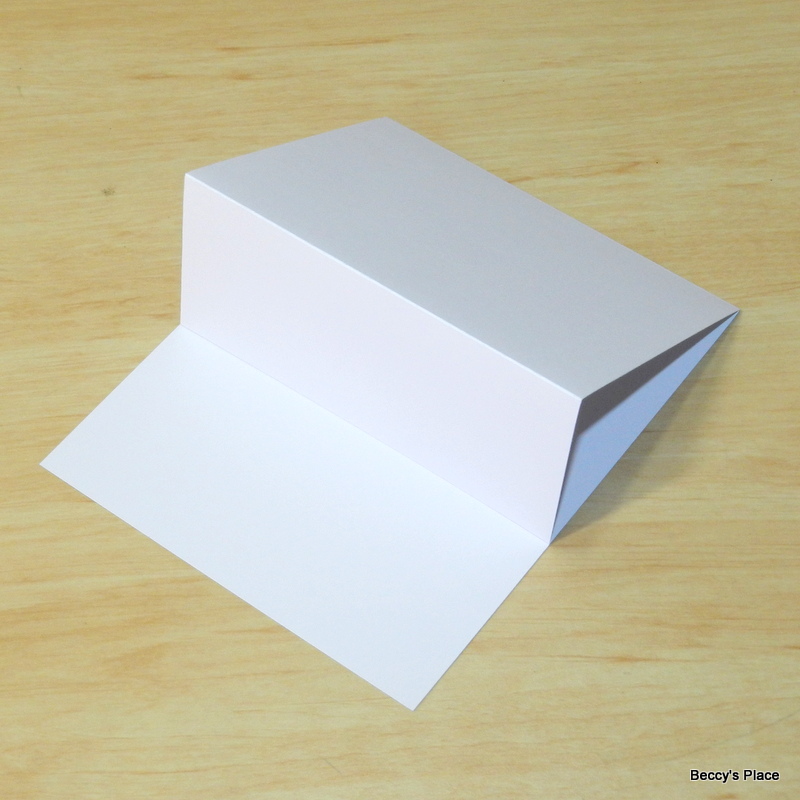
3. To create the card base, trim a piece of card stock to 10" x 4", place horizontally on your score board and score at the position that aligns with the height of your pot. In my case, that is 13/4". Make a second score line at 5". Fold along both score lines, pressing firmly with a bone folder to form the card base.


4. Line up your pot with the centre of the card. The top of the pot should align with the first score line you made. Use a pencil to trace along the edges of the pot, starting at the score line and stopping at the bottom edge of the card.


5. The lines you drew are to guide your cutting. There's no need to follow the lines exactly, just cut away the excess making sure your pot fits over the remaining card stock with nothing showing on either side.


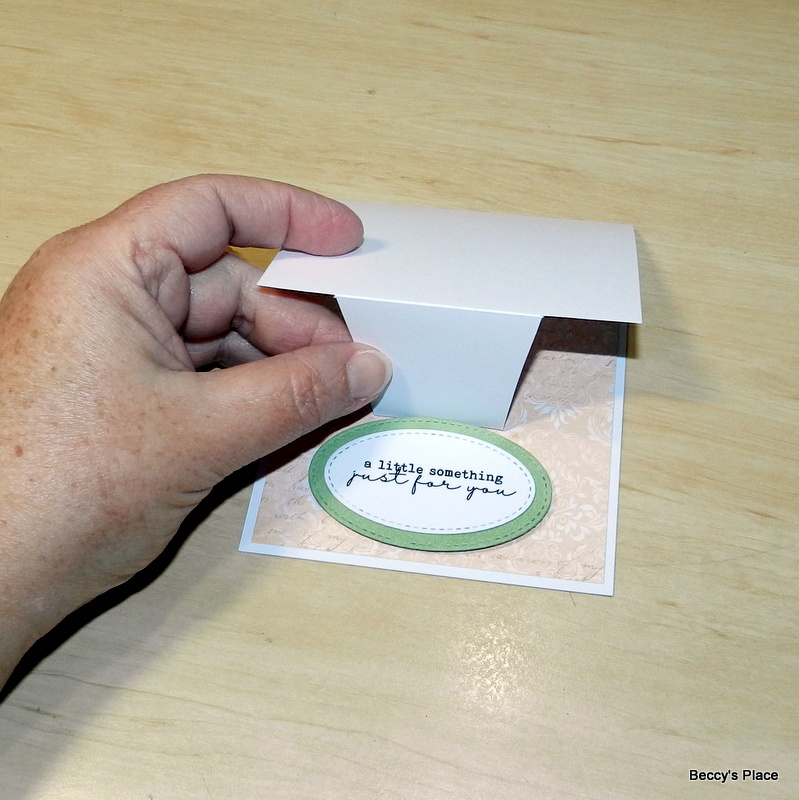
6. Add patterned paper to the inside of the card and create an "anchor" with either a sentiment popped up on foam tape, which is what I did, or with a dimensional embellishment. You'll need something that the easel section of the card can lean against.


7. Secure the flower pot to the easel with glue or strong double sided tape.


8. Now embellish as desired. I used sections of the second set of images to add some dimension to the pot and also to embellish around the sentiment. I added more patterned paper to the top section of the card that is visible when the card is closed.


Stamps: