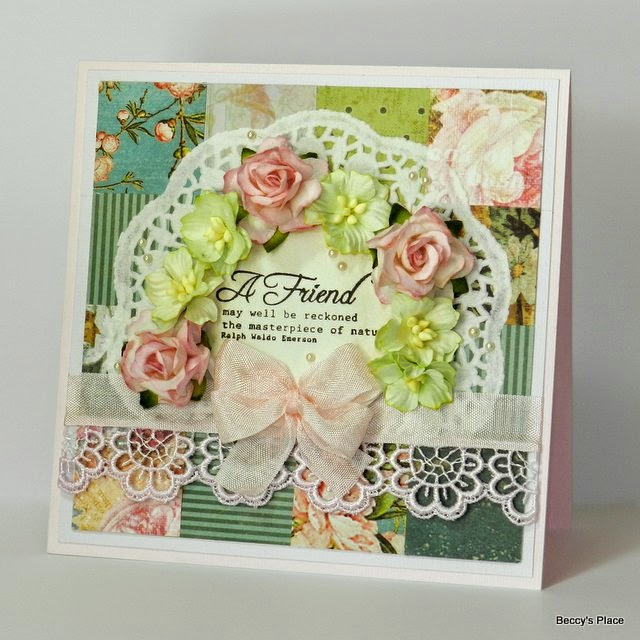
A lovely friend of mine recently asked me to make her a couple of 21st birthday cards for members of her family. She wanted one that was "pink and girly", so out came all the pretty things from my stash including lace, punches, flowers and fancy edged dies. I don't usually make a lot of loaded cards, but I was quite happy with the finished result and enjoyed the process of putting it all together.
Showing posts with label lace. Show all posts
Thursday, February 4
Sunday, April 12
Scrap Card #13
I don't generally use a lot of large flowers on my cards, mostly because they don't go through the post easily. However, I recently had a splurge at the gorgeous Wild Orchid Crafts and just couldn't resist using some of my beautiful purchases.
Wednesday, July 18
Little Chairs
At the most recent Brisbane Paper Craft Show I picked up these gorgeous little wood chairs from the Twiddleybitz stall - I can never resist making a purchase from them, everything always looks so good! Anyway, I had some lovely hand dyed calico at home that I used to make very tightly stuffed seats for each chair. A few licks of paint, some pieces of lace and trim, a couple of hand stitched cushions, long scrapbooking pins and a scattering of little flowers completed the project!
Saturday, July 14
Mini Album
I have so many 6" x 6" books of patterned paper it's ridiculous. I thought it was about time I actually cracked a pack open and put it to good use... this little album was the result. I added some beautiful flowers and a butterfly as well as a sentiment tag using a stamp and punch from Stamping Up. The lace and organza ribbon is from my stash - another area I really need to crack open more often!
Labels:
album,
butterflies,
craft,
lace,
mini albums,
pocket album
Monday, September 26
Altered Oil Lamp
Recently I was looking at a post by Ingvild Bolme (if you don't know her work then do yourself a favour and drop by her blog!). She decorated a lovely glass bottle with alcohol inks, various trinkets, flowers and chipboard, which provided me with the inspiration to try something similar...
Now I happen to have a small collection of lovely old oil and kerosene lamps collected from various second-hand and antique shops over the years. They really aren't worth much in terms of dollar value, but I like them and enjoy displaying them in my home. Anyway, this one little lamp caught my attention as the perfect item to alter and I decided to take some step-by-step photos to show how easy the process really is.
Labels:
altered,
butterflies,
craft,
embossing on glass,
lace,
lamp,
stamping
Saturday, August 13
Tutorial - Shaped Cards
Shaped cards are literally cards that are shaped to resemble something other than the standard square or rectangle. I have seen cards cut to look like teddy bears, castles, cars and even a big pencil. You are only limited by two things - your imagination and the need to retain a goodly section of the fold between the back and front of the card.
1. Decide on the size of card you wish to make and source an appropriate piece of cardstock. Score and fold it in half as you would for a standard card.
2. Using a pencil, draw an outline of the shape you wish to cut. Remember to include a portion of the fold in your design or you will end up with two separate pieces of cardstock rather than a folding card.
3. Use a knife or scissors to trim away the parts of the card you don't need. As you can see, I decided on a three tiered wedding cake for my card. It's a nice simple shape that allows for quite a lot of the fold to be retained.
Labels:
card folds,
lace,
ribbon,
tutorial,
wedding,
white on white
Subscribe to:
Posts (Atom)