Showing posts with label platypus. Show all posts

Monday, August 29

Little one

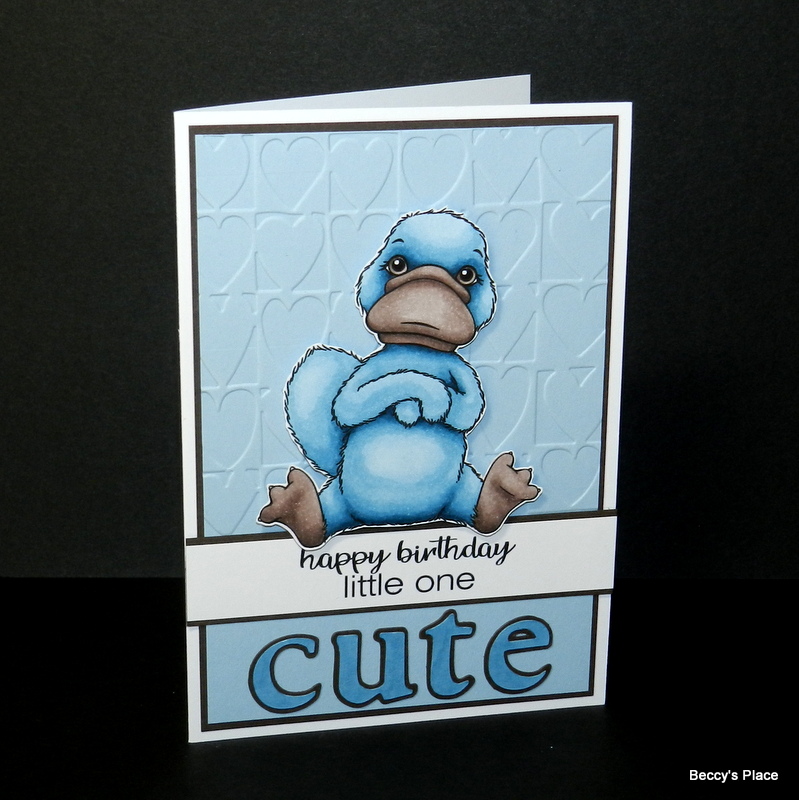
My favourite character from the Big Love set is this cute little platypus with his hands crossed over his tummy. Although I'm not sure you'll find a lot of blue platypus in the wild, I do love the combination of blue and brown and intend to send this to a sweet little boy for his first birthday.


Stamps:

Tuesday, August 23

Tutorial - Z-Fold Box Card


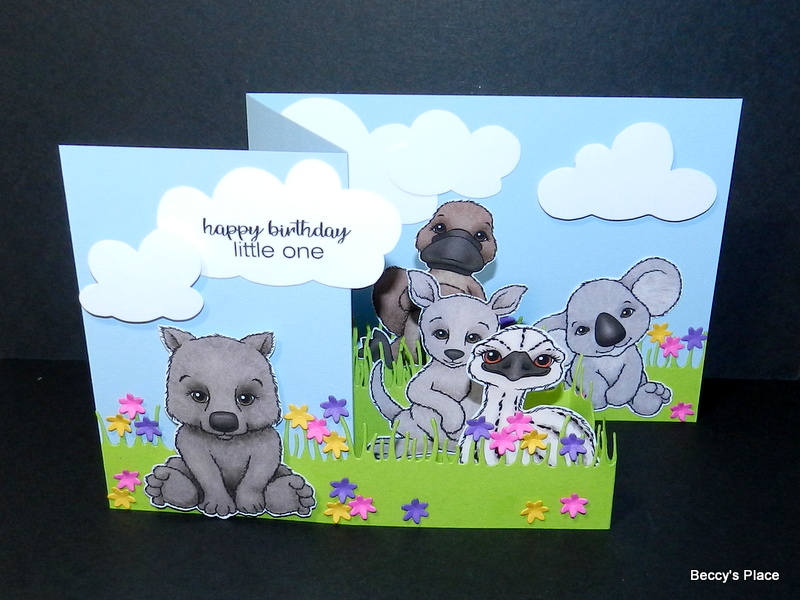
Z-Fold Box Cards are constructed with a loose concertina section in the centre that allows you to build fabulous three dimensional scenes right inside the card. They fold flat for postage - as every good card should - and can easily be adjusted for size. 


TEMPLATE:

1. You'll need one piece of cardstock measuring 111/2" x 41/4", one piece measuring 111/2" x 11/2" and one piece measuring 111/2" x 2".


2. Place the 111/2" x 41/4" piece of cardstock horizontally on your score board and score at 27/8" and 53/4". Fold along each score line, starting with a mountain fold then a valley fold. This will form your card base.


3. Place the 111/2" x 11/2" piece of cardstock horizontally on your score board and score at 27/8" and 53/4". Fold along each score line, starting with a valley fold then a mountain fold. Rotate this piece of cardstock 180 degrees so the long section is now on the left side. These two pieces form the card base.


4. If you wish to add a decorative edge to the cardstock, now's the time to do it. I used a "grass" die to add edges to both of the narrower pieces of cardstock for an outdoorsy look.


5. Flip the 111/2" x 11/2" piece of cardstock over so that the front is facing down. Add adhesive to the right hand section and adhere to the far right hand side of the 111/2" x 41/4" piece of cardstock.


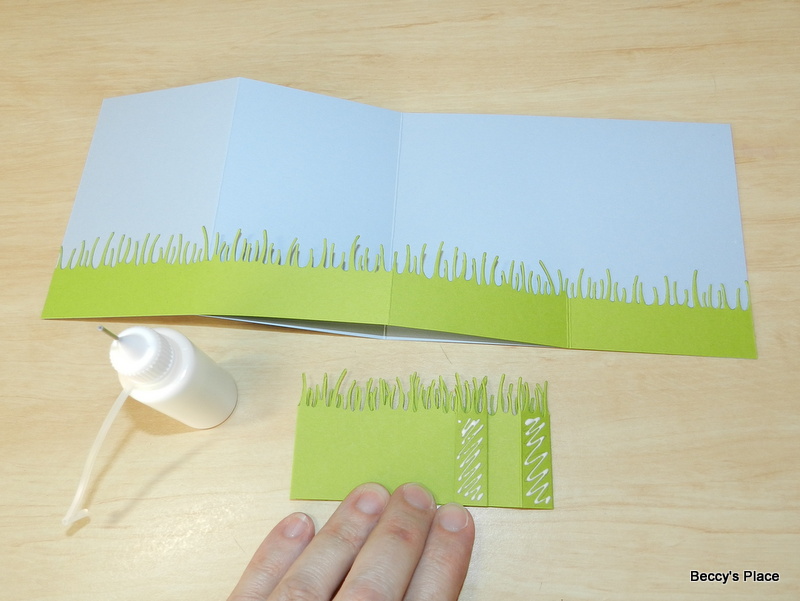
6. Stretch the narrower piece of cardstock all the way across the wider piece. They should be the same length. Turn both pieces over so they are face down on the desk. Fold back the right hand panel of the wider piece of cardstock and apply adhesive to the piece of narrow cardstock that is showing. Press the wider panel back down over the adhesive to secure the two pieces of cardstock together. (See the photos below.)


7. Place the remaining piece of cardstock on your score board and score at 1/2", 33/8", 37/8", 63/4", 71/4", 101/8" and 105/8". Trim away the excess cardstock after the final score line so that you have a 1/2" tab at each end.


8. Fold along the score lines to create a loose concertina, which should fit comfortably in the "box" section in the centre of the card.


9. Your concertina section needs to be secured inside the box. The easiest way to do this is by folding up the concertina as shown below. The tab should be folded down. Add adhesive to the tab and to the last 1/2" section of the folded piece. See the photos below.


10. Turn the concertina over so the glue is facing downward. Place it under the narrow piece of cardstock you adhered to your card base earlier, positioning it centrally and keeping the bottoms flush.


11. The concertina will be secured to one side of your card base. Now add adhesive to the same sections at the other end of the concertina and press the card flat again. This should secure the concertina in place.


12. Time to decorate! I've used all five of the little animals from the Big Love set of digital stamps, printed in colour and fussy cut. I also cut out some fluffy white clouds and die cut some tiny flowers to scatter throughout the card. Remember when you're decorating that the card will be seen from two angles... closed and fully open on display, so take care to decorate accordingly.


Stamps:

Saturday, August 13

Big Love


Take a look at the adorable cards Cynthia has created with the Big Love set of digital stamps, some colourful background paper and a scattering of fun embellishments. Such a cute way to send love and congratulations for all those exciting new arrivals and special birthday events!


Monday, August 1

Tuesday, January 25

Under The Sea


It's time for an underwater adventure with Karin, who is sharing two fabulous cards featuring the Coral Reef set of stamps.


The second card is a fun fold with concertina sides to allow more depth and space for decorating.
Karin has added a belly band to hold the card flat for postage.


Sunday, January 23

Tutorial - Pop-Up Step Front Panel Card


Believe it or not, the base of this fabulous display card is constructed with just two pieces of card stock. It can be decorated for almost any occasion and, like all the best pop-up creations, it also folds flat for postage!


1. The base is constructed from two pieces of card stock, one measuring 113/4" x 4" and the second measuring 53/4" x 23/4".


2. Place the large piece of card stock horizontally on your score board and score at 53/4", 63/4", 101/4" and 111/4". Place the second piece of card stock horizontally on  your score board and score at 41/4" and 51/4". Fold both pieces of card stock along the score lines.


3. Time to decorate! I used two coordinating papers for my card, one pattern for the base and the other on the front panel. The base pieces measure 2" x 33/4", 31/4" x 33/4" and 3/4" x 33/4". The front panel pieces measure 4" x 21/2" and 3/4" x 21/2".


4. Place the long base piece vertically on the desk in front of you so that the 53/4" section is at the top. Secure the 2" x 33/4" piece of patterned paper to the top of the card stock leaving a small, even border on three sides (see the photo below for correct placement).


5. Fold the base panel at the second score line so that three sections are visible. Secure the other two pieces of patterned paper to the lower two sections leaving the 1/2" tab at the top clear.


6. Secure the remaining patterned paper to the front panel and set aside.


7. Add glue or double sided tape to the tab on the card base. Fold the tab over and press to the back of the card base securing it in place.


8. Apply glue or double sided tape to the tab on the front panel.


9. Now fold on the second score line so that both the tab and the first section are toward the back. See the photo below.


10. Carefully line the front panel up in the centre of the base card, keeping the top edges flush.


11. Your card should look like the image below. Note that the tab is secured 1" down from the top of the card base.


12. To secure the front panel to the card base you will need to apply glue or double sided tape to the sections that overlap. Press the card so that both pieces of card stock are completely flat. The section of the front panel that overlaps the large panel on the base of the card is where you want to apply the glue. (See the photos below).


13. The card should be able to freely pop up and fold flat again.


14. Decorate your card as desired. You can add dimensional embellishments, stamps and images that overlap the front panel if desired.


Stamps: