Showing posts with label candy. Show all posts

Thursday, November 30

Day 30 - Do What You Love

It's hard to believe that we're already at the end of another Month of Holiday Cards challenge... they seem to go by faster and faster each year. For the final challenge I want you to create a project that makes you happy. Grab your favourite images and sentiments and the mediums you most love to use and create something that makes you smile.


YOUR TURN: Create a card or papercraft project that brings you joy.
Click the link below to add a photo of your creation to the challenge:

Digital Stamps:

Sunday, November 8

Day 8 - "G"

"G" is for gingerbread... the delicious Christmas staple that fills the house with spicy, mouthwatering aromas and inspires sweet and double-delicious decorating! I've added both crystal effects and wink of stella mediums to all the sweets on my gingerbread house for some sparkle and shine.


YOUR TURN: Create a project using the letter "G" as your prompt.
Click the link below to upload your creation to the challenge:

INSPIRATION WORDS:
gifts, garland, gingerbread, green, gold, gamsol, gesso, gap card, gate fold card, gilding, gold leaf, glitter, glass, glossy accents.

Stamps:

Saturday, October 10

Tutorial - Yo Yo Spinner Card


Yo Yo Spinner cards contain an awesome, interactive element that spins like an old fashioned yo yo every time someone pulls the string. The spinner can be attached to just about any kind of card, and you can easily vary the size by simply cutting smaller or larger circles!


Requirements:
  • 51/4" x 51/4" card base
  • 5" x 5" piece of red card stock
  • 43/4"x 43/4" piece of white card stock
  • two 13/4" card stock circles (I have one red and one white)
  • 11/2" card stock circle
  • two 1" acetate circles
  • small brad
  • 12" length of string
  • a sentiment and some embellishments 


1. We'll start by constructing the spinner element. Measure and mark the centre of the three card stock circles and the two acetate circles. Use an awl or piercing tool to make a hole in the centre of each circle.


2. Use glue dots or high-tack double sided tape to secure one of the acetate circles to one of the 13/4" card stock circles. Avoid placing the adhesive over the holes you pierced earlier.


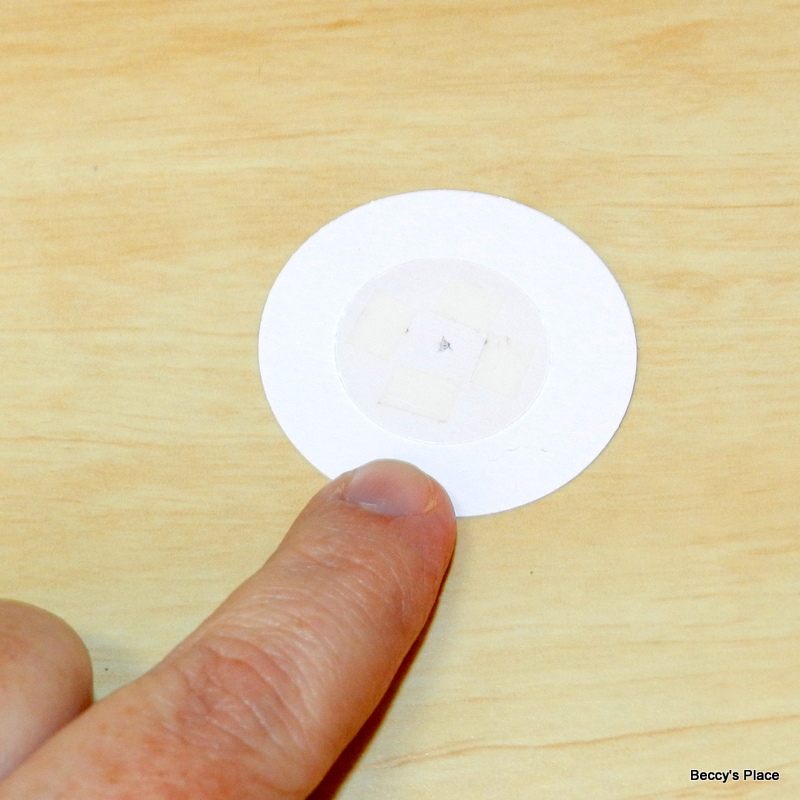
3. Trim a piece of foam tape into a rough 1/2" circle. (Start with a square of foam tape and trim off each of the four corners). Place it in the centre of the second piece of acetate, directly over the hole you pierced earlier.


4. Remove the backing, and secure one end of the string to the piece of foam tape. To ensure maximum hold, it's a good idea to fray the end of the string a little so that it sits flat against the adhesive.


5. Cut another piece of foam tape and place on top of the first, sandwiching the string between them.


6. Pierce through the layers of foam tape using the hole in the acetate as a guide. Keeping the acetate on your piercing tool, remove the backing from the foam tape and adhere to the second 13/4" circle of card stock. Use the piercing tool as a guide.


7. Now push the brad through the card stock, the foam and the acetate so that the head of the brad is against the card stock circle and the pins are protruding from the acetate. See the photos below.


8. Push the brad through the first 13/4" circle so that the two acetate pieces are touching. Open the brad pins but DO NOT make the brad too tight. The circles should move easily.


9. Decorate the spinner as desired. I added one of the candies from the Gingerbread Wishes set, but you can add any little image or sentiment you like. It doesn't have to be a circular image and it doesn't need to be smaller than the spinner, although you don't want it to be too big or you might have trouble winding the string around the mechanism.


10. Decorate your card base with the card stock squares, the embellishments and a sentiment, remembering to leave space for your spinner.


11. Apply adhesive to the back of your spinner taking care to avoid the brad pins. Make sure the string is completely unwound from the mechanism and your image or sentiment is upright before you secure it to the card base. Allow the adhesive to dry completely.


12. Now wind the string around the mechanism... and then pull! It may take two or three attempts to get the spinner to move smoothly.


13. The final step is to add a little grip to the end of the string. You could use buttons, tie a knot, add a bead or, as I've done, sandwich the string between two little circles of card stock.


This card is so much fun and will add an extra little surprise to your card-giving.
I hope you'll give it a try!

Stamps:

Tuesday, October 6

Candy Collection

The new Gingerbread Wishes set comes with some "loose candies" that I've used to create this card. As the images have transparent backgrounds, it was easy to layer them together in MSWord and then print them as a single image. I was even able to add the sentiment at the same time. The printed image was then coloured with alcohol markers and some highlights were added with a white gel pen.


Stamps:

Tuesday, January 28

Make It Sweet


You wouldn't be alone in thinking this is a real lollipop,
but it's actually a fabulous, coloured creation by Kathy Asper.


After adding all the colour to the image, Kathy used a white gel pen to enhance the lines between each section. She kept the highlight nice and bright to give the illusion of a high shine, which is one of the characteristics of this type of candy. To complete the effect, Kathy adhered a small, thin piece of dowel at the bottom of the fussy cut image and tied a piece of cellophane over the top.


Stamps:


Thursday, January 23

Candy Shoppe Cards


Welcome to our first Encore Week, one of the new additions to the blog this year.
At the end of each month, we'll be sharing new ideas and techniques using older images from our collection. We hope to inspire you to do the same with items you may have in your stash. To get us started, we're revisiting one of my old favourites - Candy Shoppe.


Judy VanZandt has created three fabulous pocket cards, decorated with hand-coloured images from the Candy Shoppe set, and finished with embellished tags. These little creations are perfect for holding money, vouchers or gift cards and will fit nicely in an envelope for posting.


Judy has coloured each of the images from the Candy Shoppe set, fussy cut around them with a pair of small, sharp scissors, and then popped them up with some foam tape for a bit of extra dimension. Using this technique creates actual shadows between the image and the background, which helps to ground the picture on the project.


Judy has kindly shared a colouring guide for those who wish to recreate her project.


Stamps:


Tuesday, November 12

Day 12 - "J"

"J" is for JOY! In my experience, it's not hard to be happy when you've got a good supply of Christmas candy, a heartwarming movie on the television and nowhere to be for a few hours.

Many years ago I wrote a little tutorial on how to create these candies using a circle punch, a pencil and some alcohol markers. Here's a link for those who are interested:
DRAWING CANDY


YOUR TURN: Create a card or papercraft project using the letter "J" as your prompt.
Click on the link to upload a photo of your creation:

INSPIRATION WORDS:
joy, jolly, Jesus, Jack Frost, jingle bells, Joyeux Noel, joy fold card, jade, jonquil, jungle green

Saturday, July 28

The Sweetest Day

I had some pieces of this fabulous patterned paper in my scrap box and thought it the perfect match for the licorice allsorts. Result - an explosion of coloured goodness!


Monday, May 22

I Like Candy...

I'm still enjoying the new Candy Shoppe digital stamp set, it's been quite a walk down memory lane for me. I remember these big lolly pops from days spent at the local fair or, if we were really lucky, a trip to the Brisbane Ekka!


Stamps: Candy Shoppe digital stamp set by Beccy's Place