Showing posts with label gingerbread. Show all posts

Monday, November 11

Day 11 - "J"

This is one of my all time favourite stamp sets... I just can't resist this little cutie and his big armful of gifts and candy canes. I think he's the perfect candidate to bring a joyful smile to friends and family.


YOUR TURN: Create a card or papercraft project using the letter "J" as your prompt.
Click on the link to upload a photo of your creation:

INSPIRATION WORDS:
joy, jolly, Jesus, Jack Frost, jingle bells, Joyeux Noel, joy fold card, jade, jonquil, jungle green

Stamps:

Friday, December 23

Sweetest Christmas


How about one more cute card before the big day arrives? Deanne has created this sweet gingerbread card using the Gingerbread Season set of digital stamps. She has added some fabulous sparkly glitter to the length of tinsel as well as different mediums for his gumdrop nose and buttons. Lots of glitz and glam on this one!


Wednesday, December 21

Colouring Candle Light


I enjoy colouring light, especially when it's warm, glowing candle light shining on a cute little face! Today I want to show you my technique for colouring candle glow using coloured pencils on smooth cardstock. You can apply the same technique to little bulbs, birthday candles, lanterns or most other light sources. If you'd like the light to be less "warm" opt for either a lighter shade of yellow or white.


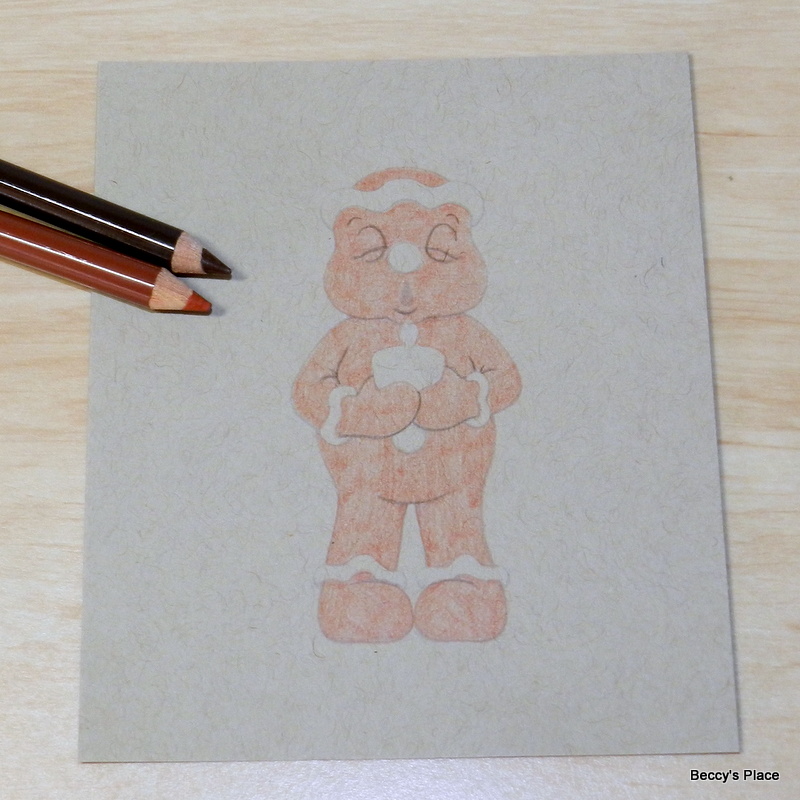
I started by printing one of the gingerbread characters onto a smooth piece of kraft cardstock. I like to use the kraft as it gives a nice base for the gingerbread cookie, both colour-wise and for texture.


I'm using a warm brown for the gingerbread base and a dark brown to shade. To make sure I don't lose the lines as I'm colouring, I generally trace over them with the darker shade so they are still visible through the first layer of colour.


I like to add additional colours between the layers, such as shading and "blush" for the cheeks. I have also coloured the candle flame, which is going to be the source of light for this project.


All the shadow areas will be above or below the light source - in this case, the candle flame. Shadows will occur wherever something obstructs the light from the candle, such as the gumdrop nose or the icing around the head. Don't forget to add shadows to the eye sockets so they recede into the head.


The light from the candle will hit the areas of the face that are not obstructed, such as the bottom of the nose, the chin and cheeks and the centre of each eyelid. Add yellow pencil to those areas making sure you fade out the colour as you move away from the light.


I coloured the icing with a cream pencil and shadowed with a warm grey tone. The icing will have shadows above as well as a very thin shadow below where the candle light can't quite reach. Don't forget to add some yellow along the bottom of the icing where the light touches.


Colour the rest of the design in the same way. Add your dark brown shadows in the areas where the candle light doesn't reach, particularly under the arms and tummy, the backs of the legs and bottoms of the feet.


I darkened some areas even further with black pencil. Adding very dark shadows helps to accentuate the light by adding contrast, but don't go overboard unless your character is in a lightless area.


Adding a final layer of the base colour will blend everything together nicely.


Now we add the glow to the body, remembering to hit the areas that aren't obstructed, such as the tops of the hands and arms. Very little light will reach all the way down to the belly and legs, but if you wish, you can add just a touch to the tops of the feet.
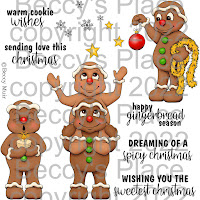

Stamps:

Thursday, December 15

Time for Gingerbread


This adorable gingerbread card was created by Kathy using the new Gingerbread Season set of digital stamps. She has used several different mediums for colour and texture, which helps to lift the character off the background and give him a decidedly 3D-look. I especially love the length of sparkly tinsel she has him holding! Fabulous!


Wednesday, December 7

The Season for Gingerbread


These delicious Christmas cards were created by Judy, using images and sentiments from the new Gingerbread Season set of digital stamps. Her first card has festive layers of red and green cardstock, poinsettia paper and an embossed holly panel that all coordinate beautifully with her colouring. Judy's second card has a wonderful, snowscape backdrop for the two little gingerbreads to frolic and play. Christmas is definitely in the air!


Monday, December 5

Partial Images


One of the nice things about digital images is the ability to enlarge the design so that just a portion of it can be used for a card or layout. Although you can also do this technique with traditional stamping, oftentimes the stamps are too small to leave out large sections without throwing out the sizing.


I enlarged one of the gingerbread men from the Gingerbread Season digital set and printed him onto a piece of kraft cardstock. I spent some time deciding on how much of the stamp I wished to keep and chose a circle die to create an appropriately sized window or frame.


Tracing around the outside of the die with a pencil gives me a guide for colouring. As you can see, I didn't draw over the bauble, as I want that to remain a part of the design.


Since I plan to "frame" the image, I cut away the unused, bottom section. I also cut 3/4 of the way around the bauble so that it can be placed on the outside of the frame.


I created a frame from cardstock and patterned paper, sizing it just a little smaller than my card blank.


Before I secure the image I need to make sure the bauble hangs outside the frame by lifting it slightly and sliding it into place. Then all that's left is to glue it to the front of the card and add a sentiment.


Stamps:

Friday, December 2

Let It Snow

After dry embossing my card base with falling "snow", I coloured each raised section with a white gel pen to give the pattern a little more oomph. The bright white contrasts beautifully with the kraft background, lifting each "snowflake" to add even more dimension.


Stamps:


Wednesday, November 24

Day 24 - "Something Sweet"

It's time for another non-letter challenge prompt, and this time we're focusing on all things sweet and tasty! There are lots of different treats that are traditionally served for the holidays, so feel free to share your favourite delicacy for your favourite holiday.


YOUR TURN: Create a papercraft project featuring your favourite holiday treat.
Click on the link below to add a photo of your creation to the challenge:
CLICK HERE

Stamps:

Friday, November 12

Tutorial - Shaped Image Cards


Digital stamps are particularly good for creating shaped cards since they can be enlarged, stretched and skewed, and if you're in a bit of a hurry, you can even print the coloured version to save some time. I printed one of the gingerbread men from the Sugar & Spice set at a little over 5" tall to create my Christmas card, and I've included some step-by-step photos at the bottom of the post.


Enlarge, print and colour the image.

Fussy cut right up to the printed line.

Place the image on a card blank with a portion overhanging the spine of the card. It can be top or side opening depending on the design. As you can see from the image below, it can be on an angle if you prefer.

Use a pencil to trace around the fussy cut image.

Cut the out the shape keeping the scissors just inside the traced line for a neater look. Make sure you don't cut through the spine of your card.

Glue the image to your card front and add additional decorations and mediums as desired.

Stamps:

Sunday, November 7

Day 7 - "F"

I've doubled up on my "F" prompts today with both figgy pudding and fussy cutting in my design. 


YOUR TURN: Create a card using the letter "F" as your prompt.
Click on the link below to add your creation to the challenge:

INSPIRATION WORDS:
Family, father Christmas, Feliz Navidad, feast, fir tree, frankincense, Frosty the snowman, fireplace, fruitcake, figgy pudding, festive, fussy cutting, fancy folds, flip flop card, fluorescent, fuchsia, French blue

Stamps: