


Trimming the tree is one of those wonderful holiday traditions that many households enjoy together, and as such, it's also a popular image for holiday cards. Today I want to show you one way of colouring and decorating a Christmas tree image for your cards, scrapbook pages, art journals and paper craft projects.

I've printed a digital image in light grey by using the "washout" feature in Microsoft Word. The lighter lines will allow me to add more colour, rather than solid black lines, and results in a finished piece that looks more like a painting or drawing rather than a stamped image. Since I'm planning to use alcohol markers, I've printed on a piece of blending card.
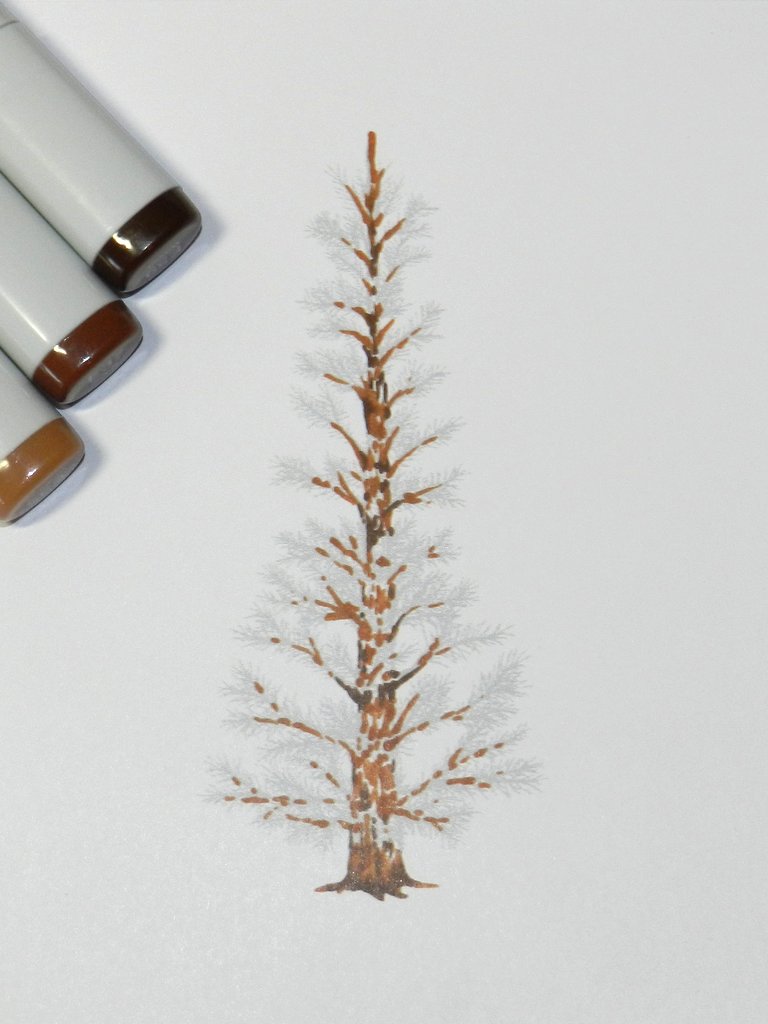
Start by colouring the trunk and branches of the tree. You want to use a few shades of brown to give a little bit of depth and interest, but there's no need to worry too much as the pine needles and decorations will cover most of it. As you can see, I've left a lot of white space in my colouring so I can layer the green over the brown. Alcohol markers are transparent and lower layers will show through whatever you apply over the top. To give the impression that some of the pine needles are actually in front of the trunk, you need to make sure the brown isn't showing through.

Add the pine needles with small strokes from the very tip of the marker.

Fill in as much or as little as you like.

Add a little bit of light green to the tips of the branches where new needles would grow.

Once the colouring is done, it's time to decorate!

I love using different mediums to add dimension, colour and texture over the top of the image. I've found some mediums are better than others at holding their shape, but it's good to mix it up with different brands. Don't forget you can also add rhinestones and self adhesive pearls. If your image is large enough, you can even think about die cuts and small stamped baubles. Have fun!
Stamps:
13 comments:
This is lovely Beccy. Any chance that you have a Card Fold Tutorial for the letter Y? It is the only letter of the alphabet left without a tutorial!
Beccy - this is truly a work of art - Maybe some day I will try this - you have great coloring skills - me - not so much - lovey work! Thanks for sharing the washout feature in Word which I knew nothing about! Making note!
That's so lovely x
Neat way to do it!Pretty
Hi Beccy I love how you have decorated that tree it is gorgeous. Take care. Hugs Jackie
Fantastic tutorial, Beccy! I enjoy the many ways you reveal the use of digital stamps (or clear stamps). I never thought of using a digital stamp as a guide like this, and making my own tree in the process. It's a clever, wonderful idea! Thank you! hugs, de
Thank you for the wonderful lesson is making an image look more like a piece of art. Love the results.
Hi Suze. I haven't been able to find any folds starting with the letter Y yet, but I'm still looking. Please let me know if you run across something. I've been trying to add those last few letters so that we'll all have something to work with next month, but no luck so far. Fingers crossed we'll find something.
Cheers,
Beccy
This is fabulous Becky. Thank you for sharing
June
I look from time to time too and haven't come across anything either. I will let you know if I do.
Maravilhoso... Adorei... Uma obra de arte... Esperando o Desafio de Novembro, um cartão de Natal por dia. Vamos lá...
Lovely! I haven't tried Nuvo drops yet but this makes me want to go out & buy some!
So pretty and sparkly!
Post a Comment