Wednesday, June 7

Tutorial - Printing Digital Paper


The new Café Elements set contains seven pieces of digital paper, which can be used for online projects or printed and used with more traditional techniques. This tutorial will also work for the free digital papers I sometimes post with the monthly challenge.


1. I'm going to start by presuming most people who read my blog know how to save digital files to their computer and can access them as necessary. So... start by opening a blank document in your word processing program (I use MS Word). I like to resize the paper to the size of my card blank, which in my case is usually 51/4" square. If you like to use 4" x 6" cards, you might like to resize the digital paper to fit exactly, or print 6" squares and cut them to size.


2. Change your printer settings to the highest quality for a smooth, even result. If you're going to print directly onto cardstock, change the paper type as well.


3. When I'm printing digital papers, I like to use a good quality paper that's slightly heavier than typical printer paper. I purchased this ream at my local office supply store, it's 120gsm instead of the standard 80, and it's bright white and very smooth.


4. Once you've changed the settings, hit print and wait for your pages to emerge. You can now use them as you would any other piece of patterned paper, but with the added benefit of never running out!


Stamps:
Monday, June 5

Everything Papercraft - Watermarks


A watermark is an image or design that is stamped or pressed into paper during manufacture. It is usually subtle and difficult to observe without adequate lighting and will often be a company logo or security seal.

Paper-crafters can imitate watermarks by stamping with clear Versa Mark stamp pads, which will leave an image that is slightly darker than the paper being stamped on. Because Versa Mark ink is designed to stay open (wet) longer than normal ink pads you will need to leave it to dry for a longer period of time or set it with a heat gun. You could even add some clear embossing powder for a less subtle result.

Saturday, June 3

You Sparkle


Cynthia's fairy cards are filled with wonderful, bright colours and lots of sparkly glitter... perfect for cheery birthday wishes, get well cards and gift tags! Click on the link below to head to her blog for more great ideas and inspiration.


Friday, June 2

May Winners

Congratulations to the May Challenge Winners!
Lori (12), Suzana (37) and Suze (31)
You are the randomly chosen winners of last month's challenge.
If you already have a Beccy's Place store account, I'll be adding a $20.00AU credit very soon.
If not, please email me at beccy@beccysplace.com to claim your prize.

Thursday, June 1

Funky Chooks


Original artwork by Beccy Muir, all rights reserved. Images are for personal use and must not be copied, swapped, shared, resold or mass produced without the express written permission of the artist.

New Releases


New Digital Stamps

Café Elements
digital stamps
Includes images, sentiments, papers, embellishments, and card toppers.


Fairy Folk
digital stamps

June Challenge


Create a card or paper-craft project using any Beccy's Place image, upload a photo of it to your blog or other hosted site, and submit a direct link below. The challenge runs from now until midnight on the 30th of June 2023 (AEST).


To keep things interesting, I'll be adding an additional optional element to the monthly challenges, and this month I want you to add some doodling or handwriting to your creation. Here are some tutorials to help inspire you...

PLEASE READ THE CONDITIONS CAREFULLY
BEFORE ENTERING THE CHALLENGE
  • Entries that don't meet the conditions will be deleted from the challenge.
  • Your project must be created during the month of June 2023 and entered into the challenge during the active challenge period. Due to an automated system, late entries cannot be accepted.
  • Each month I will include a digital image from my library of freebies as well as a bonus challenge, such as a card sketch, bingo grid, etc. You DO NOT have to use the image or bonus challenge on your project, but you MUST use a Beccy's Place image, either free or purchased, to be eligible for entry.
  • You can enter as many times as you like and you can submit your card to any other challenge you wish.
  • At the end of the month three different random winners will be chosen to receive a $20.00AU store credit for any digital stamps at Beccy's Place. To redeem the store credit, winners must have a Beccy's Place customer account. (Please note, you do not need an account to enter the challenge. It is acceptable to create an account in the event that you win. Accounts can be closed at any time.)
  • Store credit won during any Beccy's Place challenge is redeemable for digital stamps in the Beccy's Place online store.
  • Entries can be uploaded to the challenge from any hosted site including blogs, online galleries, Google photos, etc. If you do not have access to a hosted site, please feel free to email your photos to me and I will add them from the Beccy's Place Guest blog.
  • Beccy's Place designers may enter the monthly challenge but are not eligible to win prizes.

Tuesday, May 30

Hey!

One friendly cockatoo sending birthday greetings to a friend!


Stamps:

Sunday, May 28

Bright and Bold


Check out the awesome cards Anesha created with the new For The Birds set of digital stamps. Bright colours, fabulous patterned paper and fun die cuts resulted in three great cards that are sure to bring a smile to someone's face.


Friday, May 26

Inspired By Nature


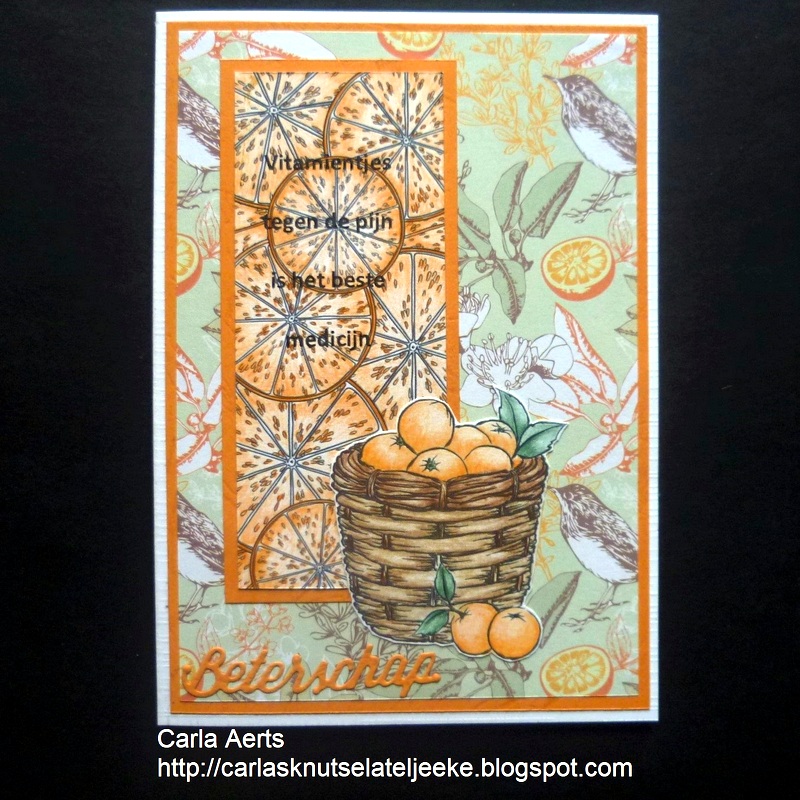
Carla has created two beautiful cards inspired by nature and the changing of the seasons. She embellished the image panels from our new Card Panels 1 set and layered them onto beautiful coordinating backgrounds.


Thursday, May 25


Selected, retired digital stamps at an incredibly low price for just 48 hours.
No rainchecks. No repeats.

Nasturtium
digital stamps

Tuesday, May 23

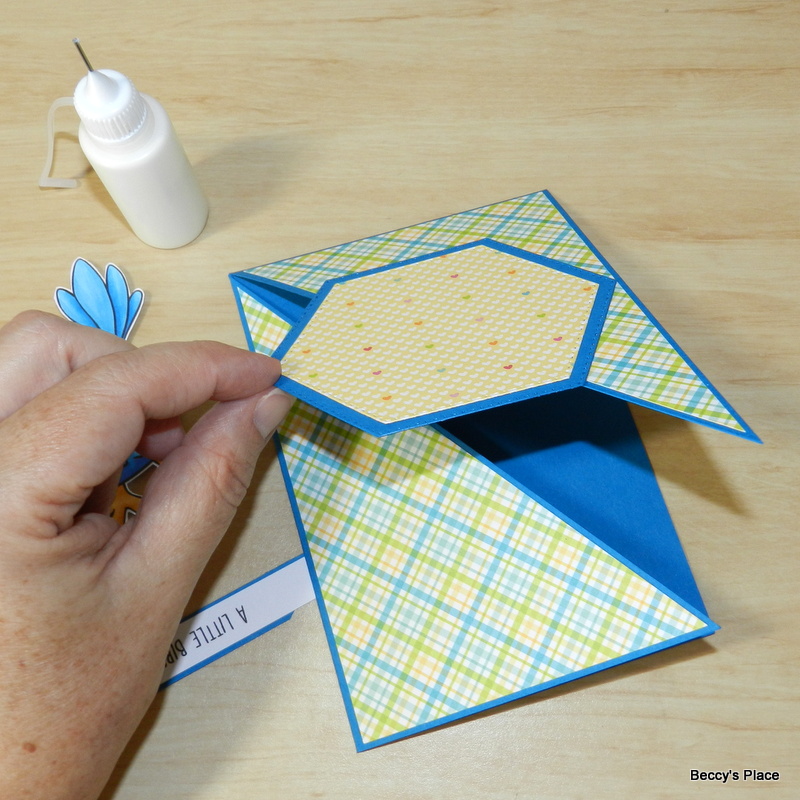
Tutorial - Diagonal Cut Cards


Quick, resizable, folds flat for postage AND it's a two-for-one!!


1. Start with a piece of cardstock - I'm using an A4 piece but the size doesn't really matter, so use whatever you have in your stash. Place it vertically on your scoreboard and score at the halfway point. Turn it 90 degrees so that it's horizontal and score again at the halfway point.


2. Cut the cardstock diagonally from one corner to the other. Your cut should pass through the intersection of the two scored lines. These two pieces will be individual cards (the two-for-one I mentioned earlier).


3. Fold along the score lines to form the card base.


4. Time to decorate! Cut a piece of patterned paper that is 1/4" shorter and 1/4" narrower than your card base. (For example, if your card base measures 6" x 4", cut your patterned paper to 53/4" x 33/4")


5. Cut the patterned paper diagonally from one corner to the other. These two pieces will fit on the front panels of your card base with a small border around the edges. Secure them in place with glue or double sided tape.


6. Decorate the front in whatever manner you wish. I found that an image panel fixed on one side of the opening provided enough weight to hold the card closed. Just remember to only apply adhesive to one side... you don't want to glue the card closed!


7. I added a white panel to the centre of my card for a personalised message, as well as a little image and some sentiments.


Stamps: