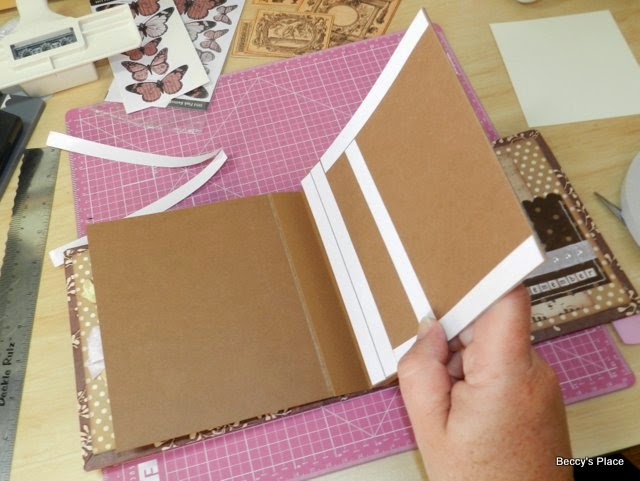
The next step in our mini album is creating the pages. Each page is affixed back to back to a partner, as you'd find in a normal book, so I'm going to work in pairs, securing each double page into my album as it is created.
Each page is going to measure 6" x 6", although I want some of the pages to have a fold out section, which I'll explain when we move onto page two. For now, I'm going to start with one 6" x 6" piece of brown cardstock and one 6" x 6" piece of patterned paper.
I used double-sided tape to adhere the paper and cardstock together, then started adding pockets and embellishments. The long piece of patterned paper on the page below is a pocket that opens on the left-hand side. It will hold a square tag.
The back of the tag is decorated with a sentiment stamp leaving plenty of room for journaling or even some small photos.
The completed page. As you can see, I added a couple of butterflies and also decorated the front of the tag with patterned paper, some little letters and a charm.
Page two has a flip out section on the left hand side. To create this, I started with a piece of cardstock measuring 6" x 9" then folded it so I ended up with a 3" flap that can open and close. I used a scallop border punch to add a nice edge.
Here are my two pages side by side. When I secure them to the binding of my album, they will be back to back.
Add a couple of lengths of double sided tape to the back of your pages, ensuring that you add it to the side that is going to be secured to the binding.
I want to make a pocket between the two pages for a large tag, so as with the smaller tag pockets, I've used double sided tape on three sides leaving a place for a large tag to slide in and out.
I don't want my tag to slide all the way into the pocket so I add an extra piece of tape where I want it to stop.
Now I will secure the pages to my binding, starting with page one. Remove the backing of the double sided tape and line up the edge of the page with the first piece of binding.
Don't let the page go all the way down to the fold line or you'll have trouble keeping the pages closed. I left about 1/8" between the edge of the page and the fold line.
Now secure page two to the back of page one. The double sided tape we applied before will hold it in place as well as form the pocket for the large tag.
Now we have our first double page in place. All that's left is to decorate the tag and place it between the two pages.
Here's the decorated tag...
... and the page complete with tag.
Tomorrow we'll move on to pages 3 and 4.
Pages 3 & 4


3 comments:
This is so creative thank you for sharing it your so talented x
So creative and pretty.
I made many mini albums for Christmas gifts and as I was searching for new ideas I came across this post. Your pages are still fresh and unique. Thank you for sharing.
Post a Comment