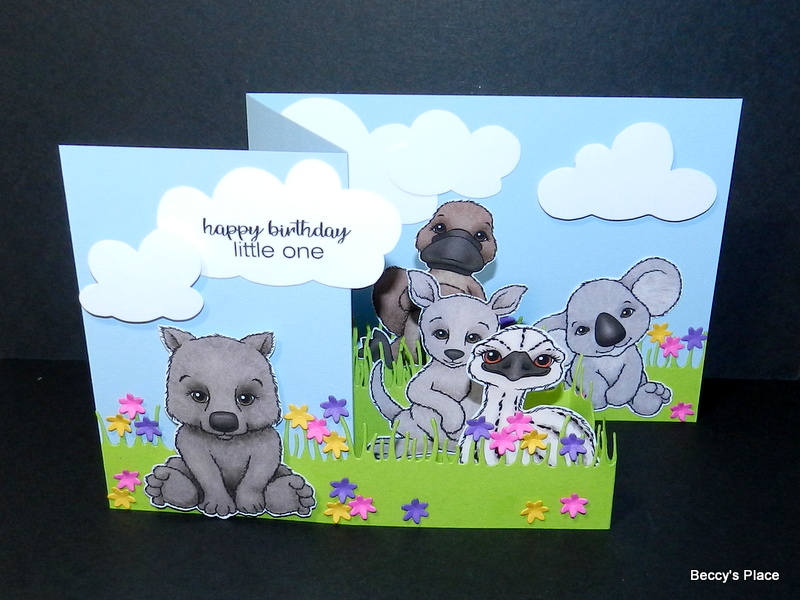
Z-Fold Box Cards are constructed with a loose concertina section in the centre that allows you to build fabulous three dimensional scenes right inside the card. They fold flat for postage - as every good card should - and can easily be adjusted for size.
TEMPLATE:
1. You'll need one piece of cardstock measuring 111/2" x 41/4", one piece measuring 111/2" x 11/2" and one piece measuring 111/2" x 2".
2. Place the 111/2" x 41/4" piece of cardstock horizontally on your score board and score at 27/8" and 53/4". Fold along each score line, starting with a mountain fold then a valley fold. This will form your card base.
3. Place the 111/2" x 11/2" piece of cardstock horizontally on your score board and score at 27/8" and 53/4". Fold along each score line, starting with a valley fold then a mountain fold. Rotate this piece of cardstock 180 degrees so the long section is now on the left side. These two pieces form the card base.
4. If you wish to add a decorative edge to the cardstock, now's the time to do it. I used a "grass" die to add edges to both of the narrower pieces of cardstock for an outdoorsy look.
5. Flip the 111/2" x 11/2" piece of cardstock over so that the front is facing down. Add adhesive to the right hand section and adhere to the far right hand side of the 111/2" x 41/4" piece of cardstock.
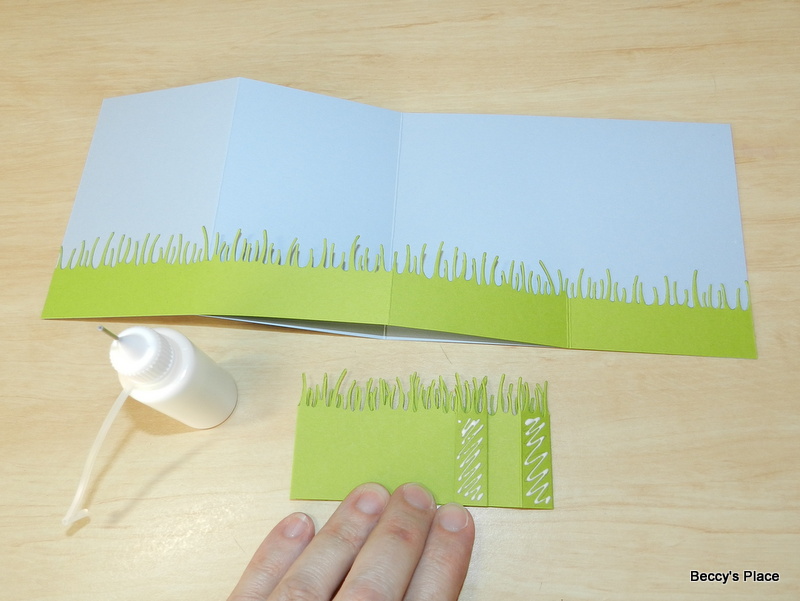
6. Stretch the narrower piece of cardstock all the way across the wider piece. They should be the same length. Turn both pieces over so they are face down on the desk. Fold back the right hand panel of the wider piece of cardstock and apply adhesive to the piece of narrow cardstock that is showing. Press the wider panel back down over the adhesive to secure the two pieces of cardstock together. (See the photos below.)
7. Place the remaining piece of cardstock on your score board and score at 1/2", 33/8", 37/8", 63/4", 71/4", 101/8" and 105/8". Trim away the excess cardstock after the final score line so that you have a 1/2" tab at each end.
8. Fold along the score lines to create a loose concertina, which should fit comfortably in the "box" section in the centre of the card.
9. Your concertina section needs to be secured inside the box. The easiest way to do this is by folding up the concertina as shown below. The tab should be folded down. Add adhesive to the tab and to the last 1/2" section of the folded piece. See the photos below.
10. Turn the concertina over so the glue is facing downward. Place it under the narrow piece of cardstock you adhered to your card base earlier, positioning it centrally and keeping the bottoms flush.
11. The concertina will be secured to one side of your card base. Now add adhesive to the same sections at the other end of the concertina and press the card flat again. This should secure the concertina in place.
12. Time to decorate! I've used all five of the little animals from the Big Love set of digital stamps, printed in colour and fussy cut. I also cut out some fluffy white clouds and die cut some tiny flowers to scatter throughout the card. Remember when you're decorating that the card will be seen from two angles... closed and fully open on display, so take care to decorate accordingly.
Stamps: