Thursday, March 30


Selected, retired digital stamps at an incredibly low price for just 48 hours.
No rainchecks. No repeats.

Country Florals

Tuesday, March 28

Book Worm


Cynthia has been busy in her craft room creating beautiful cards and tags with the Book Lovers set of digital stamps. The image on her first card has been fussy cut and popped up to give it lots of beautiful dimension. And don't you just love the patterned papers she has chosen for each card?!


Sunday, March 26

Blue & Yellow

Today's card features another of the book bundles from the new Book Lovers set. I created this particular image with my mother-in-law in mind. She's a Master Gardener and spends much of her time growing plants, trees, flowers and vegetables, both at her home and at her local community garden, which donates hundreds of pounds of fresh produce every year to those in need.


Stamps:

Friday, March 24

Cherry On Top


Deanne has used the cherry ice cream image from the new Ice Cream Cones set of digital stamps to create today's project. She combined pretty pinks, reds and greens for a fantastic birthday card for a sweet friend.


Wednesday, March 22

Clean and Simple

I coloured one of the images from the new Ice Cream Cones set, fussy cut and layered it onto a card base made from a sheet of hammered card stock. A few dots of liquid pearls and a sentiment strip completed my clean and simple design.


Stamps:

Monday, March 20

Book Lovers


Most of us know a book worm who would love to receive a reading themed card for a birthday, anniversary or just to say hello. Anesha has created these two beautiful examples using the Book Lovers set of digital stamps.


Saturday, March 18

Tutorial - Arrow Fold Cards


Arrow fold cards are easy to create from any size card blank...
all it takes is a couple of folds and some decorations and you're done!


TEMPLATE:

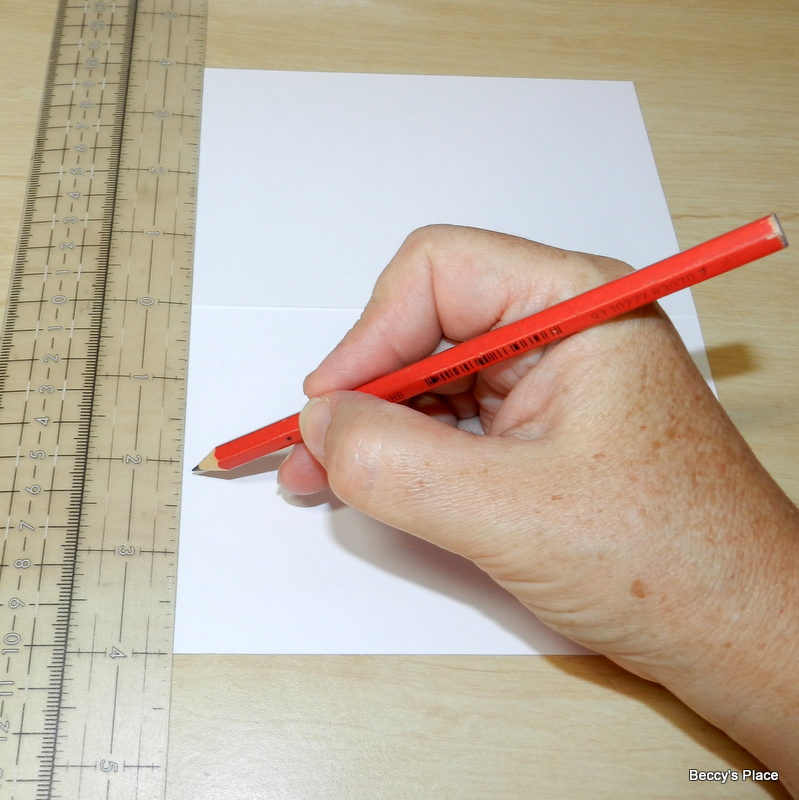
1. Start with a 6" x 8" piece of cardstock, score and fold in half to create a 6" x 4" card blank.


2. Place a pencil mark at the centre point of your card blank, along the bottom edge. Mark the centre of each side of the card, measuring from the centre fold to the bottom edge. See the template for correct placement.


3. Score from the beginning of the centre fold to the mark you made at the bottom of the card. Score again from the end of the centre fold to the mark at the bottom of the card. Now score from each side mark to the mark at the bottom of the card. You should end up with four diagonal score lines. See the template for correct placement.


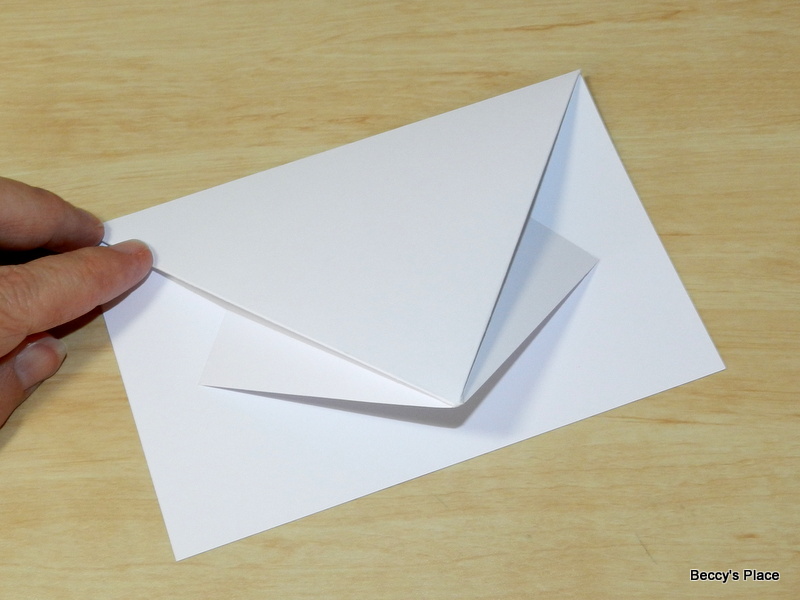
4. Turn the cardstock over and make valley folds along the first two score lines, creasing well.


5. Now make mountain folds along the second two score lines to form the "arrow" section of the card.


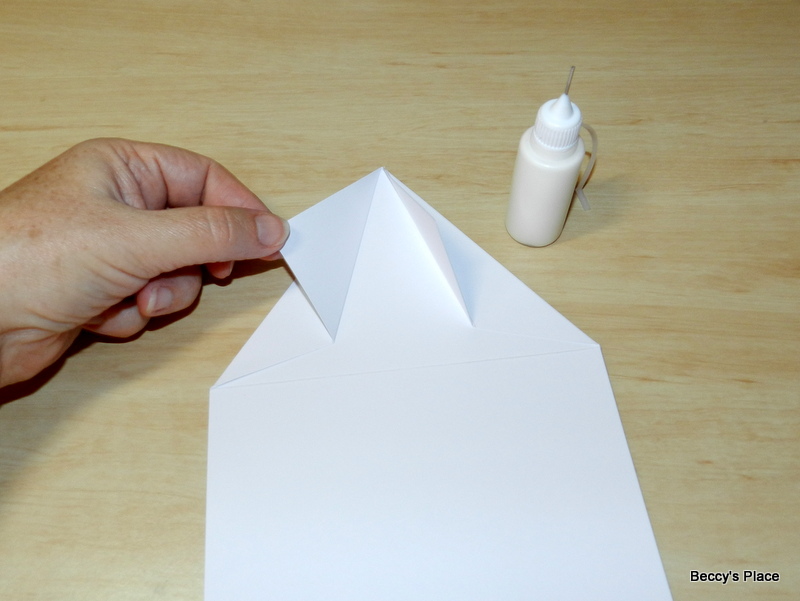
6. You can leave the folds as is, but I find they sit better and the card folds flatter if you glue the arrow section down. Take care to apply the glue only in the areas covered by cardstock - you don't want to glue your card shut.


7. To decorate, you'll need two coordinating pieces of patterned paper, one measuring 53/4" x 33/4" and the other measuring 51/2" x 31/2".


8. As you did with the card base, measure and mark the centre point on one long edge of each piece of patterned paper. Use your trimmer, scissors or craft knife to cut from the top corners to the centre mark. See the photos below.


9. Use glue or double sided tape to secure the small pieces to the larger pieces leaving a narrow border.


10. Secure the large triangle to the card front leaving a small border of cardstock around the edges. The two smaller triangles are glued to the inside of the card, again leaving small borders of cardstock.


11. Add a sentiment, image and embellishments to complete your project.


Stamps:

Thursday, March 16

Sweet Celebration


Gift bags with matching tags, handmade cards and beautifully coloured images... it's sure to be a sweet celebration at Cynthia's house with all these gorgeous projects! She enlarged the cherry ice cream cone to decorate the front of a colourful gift bag, then created a little matching tag to complete her wrapping. Two beautiful, handmade cards complete the set.


Tuesday, March 14

Hot Tip Tuesday


Stationery stores are a great place to find interesting embellishments for your cards, layouts and papercraft projects. They have fancy coloured tapes and aisles of pens and markers, little envelopes for holding ephemera as well as clips, tags and pins of every kind. You can add colour to staples or split pins with alcohol markers and permanent inks, or jazz up some paperclips with a piece of washi tape cut to look like a little flag. 

Sunday, March 12

A Good Day to Read


Check out this fabulous paper-pieced card created by Deanne. She used a pretty combination of colours and patterns to piece together one of the images from the Book Lovers set of digital stamps, combined it with one of the sentiments and a large organza ribbon for a fantastic result.