Sunday, April 30

Light The Candles

I've combined images from two digital sets to create this card - the fire engine and sentiment are from the new Wheels set and the candles at the bottom are from Make A Wish. For those who are computer savvy, you could layer the sentiment and images together before printing so you end up with a single image. I decided to print my candles separately, coloured them to match the fire engine, then fussy cut around them before securing them to my card.


Stamps:

Saturday, April 29

Twist and Pop


Karin has made a fabulous twist and pop card, decorating the panels with different parts of the images from the new Birthday Bears set of digital stamps. This is a wonderful way to extend your stamps for a fabulously coordinated project.


Friday, April 28

New Cutting Dies


New cutting dies to coordinate
with some of our old favourites!

Available through our Beccy's Place stockists.
Remember, if you can't find what you're looking for, just send an email
to one of the listed retailers requesting the items you want.


Thursday, April 27


Selected, retired digital stamps at an incredibly low price for just 48 hours.
No rainchecks. No repeats.

Fairy Travels
digital stamps

Wednesday, April 26

My Favourite

Even though this old guy looks like he's seen quite a few birthdays,
he still enjoys the excitement of gifts, cake and a party!


Stamps:

Tuesday, April 25

Monday, April 24

One Top Bird


Brand new clear stamp designs!

These emus not only know how to have a good time, but also how to dress perfectly for each occasion! Fun and quirky images with a mix of sentiments that are sure to bring a smile to all the "top birds" in your life.


Stamps:

Sunday, April 23

Officially Vintage


Kathy has a fabulous sense of humour and loves to make fun and quirky cards for her family and friends. She always does a fantastic job of decorating both the front and the inside of her cards, as you can see from these photos!


Friday, April 21

Everything Papercraft - Distressing


Distressing is a decorative process that adds texture and gives paper projects a vintage or worn look. There are many techniques paper crafters use to distress paper and cardstock, including inking the edges, tearing, applying paints and tints, scrunching, burning, and roughing up the edges with sandpaper, scissors or specific tools. It’s an inexpensive technique that can add a great deal of character and interest to a project and is popular for shabby chic or grunge-style crafts.

Roughing the edges and scrunching the cardstock for a shabby chic result.

Wednesday, April 19

Tutorial - Overlapping Fun Fold Card


Overlapping Fun Fold Cards are simple to make and can easily be altered for different sizes and designs. They are constructed from several small parts, meaning they're also great for using up some of those cardstock and patterned paper offcuts we all seem to have.


1. Start by trimming your cardstock and patterned paper into the required sizes. For clarity, I've listed the colours I used for my card, but feel free to choose the colours you wish to use.

CARDSTOCK (PINK)
one 6" x 4"
one 43/8" x 37/8"
one 31/2" x 3"

CARDSTOCK WHITE
one 57/8" x 37/8"

PATTERNED PAPER
two 37/8" x 1"
one 33/4" x 33/4"

IMAGE PANEL
one 27/8" x 27/8"


2. Secure the two 37/8" x 1" pieces of patterned paper to the top and bottom of the white cardstock with glue or double sided tape. This will form the centre of the card. If you wish, you can stamp a sentiment in the middle, leaving room for a personal message.


3. Place the 43/8" x 37/8" piece of cardstock horizontally on your score board and score at 1/2". Repeat for the 31/2" x 3" piece of cardstock. Make a light mountain fold along each score line. Turn the cardstock so that the larger one has the score line down the left hand side, and the smaller piece has the score line down the right hand side. See the photos below.


4. Secure the 33/4" x 33/4" piece of patterned paper to the larger piece of pink cardstock, and secure the image panel to the smaller piece of pink cardstock, leaving a narrow border around each.


5. Turn the larger piece of pink cardstock over and apply glue or double sided tape to the 1/2" tab you created earlier. Fold it around the piece of white cardstock so that the tab is at the back and the pink cardstock completely covers the white area. See the photos below.


6. Turn the image panel over and apply glue or double sided tape to the tab section in the same way you did in step 5. Fold it around the white cardstock and the first piece of pink cardstock, securing the tab at the back. Use a bone folder to press the folds firmly.


7. Use glue or double sided tape to secure the white cardstock to the 6" x 4" piece of pink cardstock, leaving a narrow border around all four sides.


8. If you wish, you can add further stamps and embellishments to complete your card.


Stamps:

Tuesday, April 18

Mechanoids


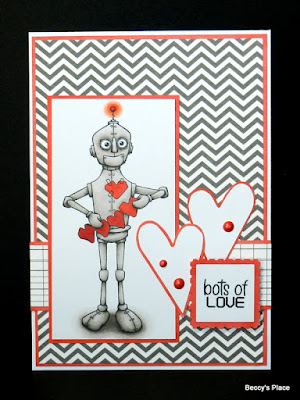
Mechanoids is one of our new clear stamp sets, available through our fabulous stockists.

I coloured all three images with warm grey tones then added a single feature colour, which I repeated for the rest of the card design. When I didn't have matching cardstock, I simply used a marker to colour a piece of white card to coordinate perfectly with my image.


Stamps:

Monday, April 17

Beary Happy Birthday


It's a beary happy birthday at Judy's place!
She has coloured all three of the Birthday Bears images to create this fabulous set of cards.