Showing posts with label Rainbow Lorikeets. Show all posts

Saturday, September 28

Life In Full Colour - with Anesha


Anesha is the queen of off-the-page projects here at Beccy's Place, and boy do I have a fabulous example of her work to share today. Have a look at the gorgeous wine box she decorated using the images from the new Rainbow Lorikeets digital stamps. There's even a cute little gift tag to match!


Anesha has very generously shared a colour guide for those who are curious about her choice of medium.


For more information or to see other creations from Anesha, please stop by her blog:

Thursday, September 19

A Celebration of Colour - with Karin


Karin has put her Derwent colour pencils through their paces while colouring the birds from the new Rainbow Lorikeets set. She has kindly shared her colouring guides so you can see all the fabulous pencils she has used on her projects.


Don't you just love the heart Karin has added behind the two birds below? She achieved this look by masking off the section behind the birds with a heart shaped mask and then adding colour with various crayons. They blend together beautifully for a nice, soft background.


You can check out more of Karin's work over on her blog:

Saturday, September 14

Tutorial - Curtain Fold Card


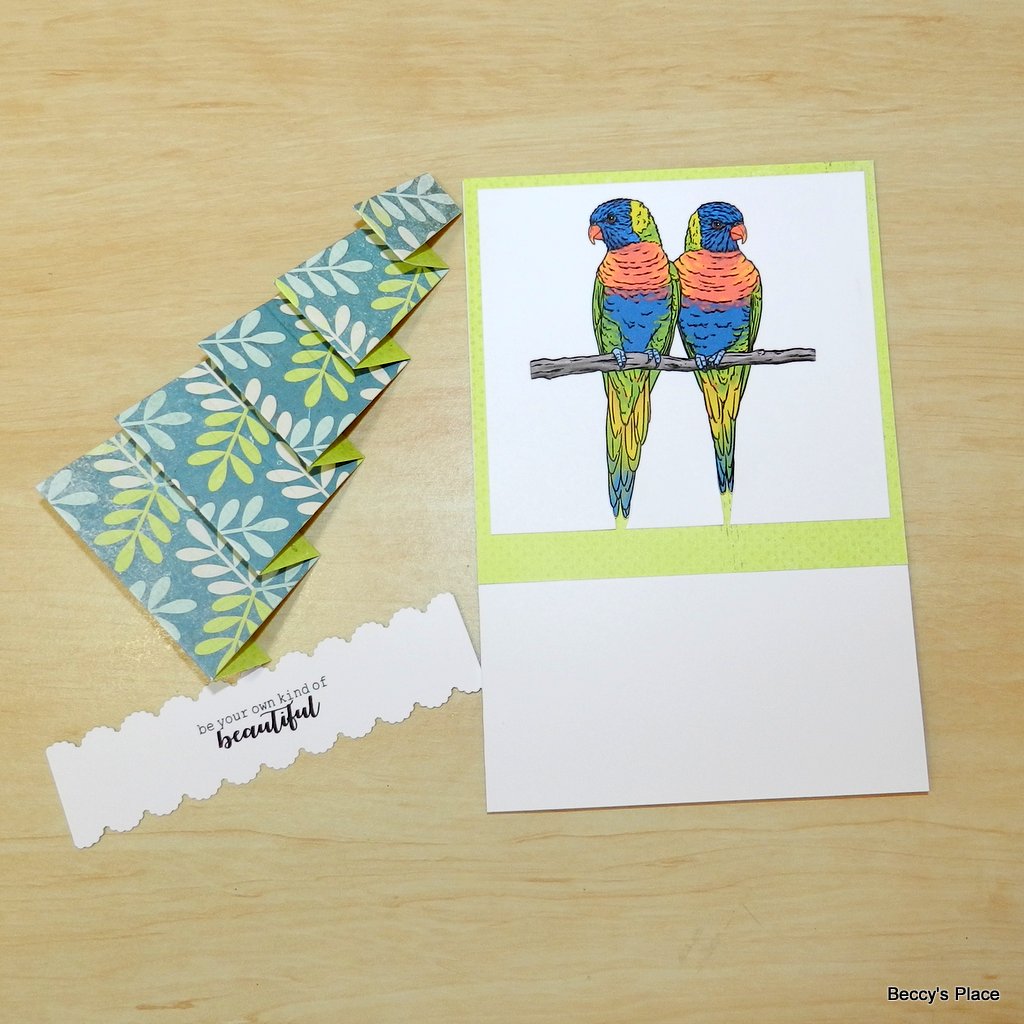
Today's tutorial is more of a decorative element than a true card fold technique.  It involves concertina folding a piece of double-sided paper to form a pretty decoration that brings to mind pleated curtains. 


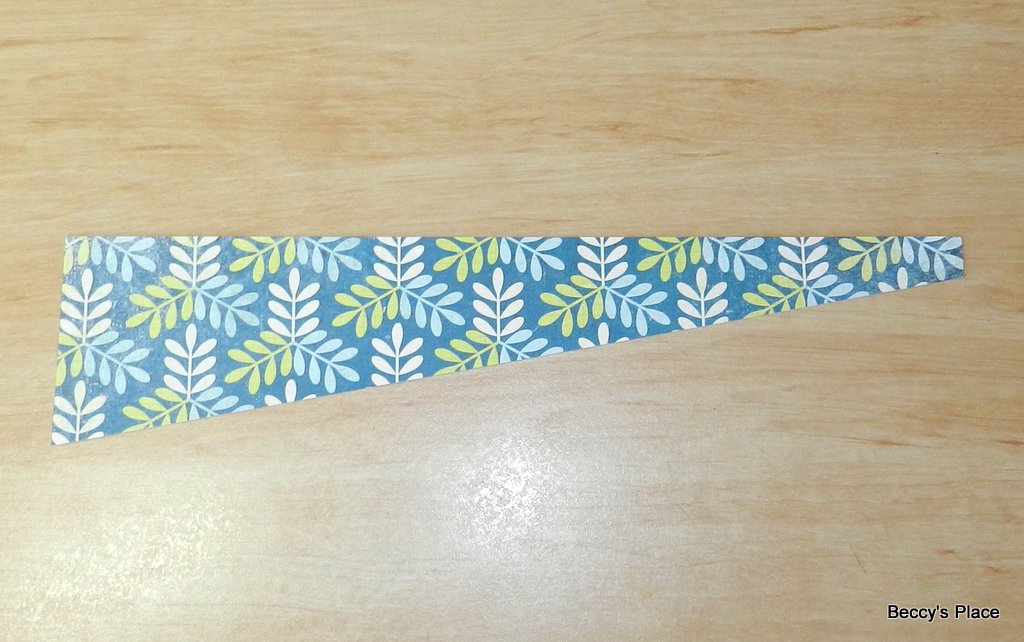
1. Start with a strip of double-sided patterned paper measuring 21/2" x 103/4". Measure 3/4" from the bottom, right hand edge and mark with a pencil. Using a ruler and craft knife or a trimmer, cut from the top, left hand corner to the mark you made on the right hand side. We'll only be working with the piece that has one 21/2" edge and one 3/4" edge. 


2. Place the patterned paper on your score board with the horizontal edge against the top and the 21/2" edge at the left edge. See the photo below. Score at 3/4", 21/4", 3" 41/2", 51/4", 63/4", 71/2", 9" and 93/4".


3. Beginning with a mountain fold, concertina the scored paper from beginning to end. Once folded, it should measure 4" wide. 


4. Apply a small amount of glue between each fold and press firmly to hold in place.


5. Now it's time to assemble your card. You can add whatever images, stamps, decorations and embellishments you like. Traditionally, the folded patterned paper is positioned at the bottom of the card as a kind of frill.


6. Apply a couple of strips of double sided tape or some glue and attach the "curtain" at the bottom of your card.


7. Add a strip of ribbon, washi tape or card stock over the top of the "curtain" to give it a finished look. Complete your card with a sentiment and whatever additional embellishments you like.


Stamps:

Tuesday, September 10

Hot Tip Tuesday


Many digital stamps  you purchase come with a full colour version of the line drawing. Even if you prefer to colour the image yourself, you can still take advantage of the bonus image by printing a small version as a colouring guide. It saves you having to constantly refer back to a picture or computer screen while you're crafting.


Sunday, September 8

Live Life

Lorikeets are very colourful parrots that are common in my part of the world. They arrive in our front yard each morning to drink the nectar from some of the native flowers in our garden and to splash and squawk loudly in the birdbath. Such ostentatious plumage requires lots of bright colours, which took me a while to find in my stash. It seems I tend to go for more muted tones... looks like a trip to the craft store is in order!


Friday, September 6

Colouring the Lorikeet

Bird feathers grow in layers, so when you're colouring, you don't want to end up with a very smooth finish or seamless blends between colours. The feathers on rainbow lorikeets are colourful and distinct... they are blue and then they are red without having a gradual colour change.


I printed the lorikeet digital image in very light grey ink so the lines would be almost invisible once the image was completely coloured. I coloured the feathers of the bird allowing the texture of each brush stroke to follow the natural contours of it's body, which helps to create the illusion of individual feathers as well as describing the shape of the bird.


Add coloured pencil over the top of the marker to help define the finer features such as the nostrils, beak and eye.


Add a little more detail to the eye. This is the first place we tend to look when viewing an animal or person and therefore needs to be convincing.


Don't forget to make a note about the colours you use on your creation, it will become a surprisingly handy reference for future projects.

Stamps:

Sunday, September 1

September New Releases


Ahhhh, spring... (in my part of the world at least) and what better way to celebrate
than with some new images filled with birds and pretty blooming flowers?


Cottage Garden
digital stamps


Rainbow Lorikeets
digital stamp