


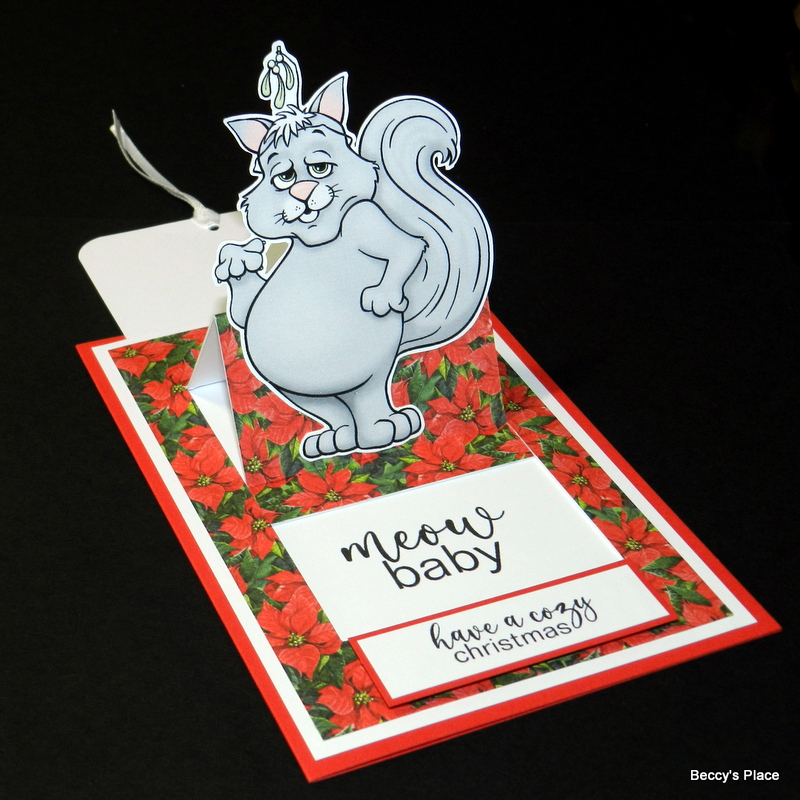
Surprise Pop-Up cards are fun to create and have plenty of room for sentiments and hidden embellishments. The mechanism creates a tiny, pop-up easel panel right in the centre of the card, with the added benefit of a large tag that's perfect for holding a handwritten message or bonus image.
1. Cut a piece of card for the base measuring 8" x 53/4". Score and fold in half so that you have a 4" x 53/4" card base. You'll also need a piece of coordinating cardstock measuring 33/4" x 51/2" and a piece of patterned paper measuring 31/2" x 51/4".

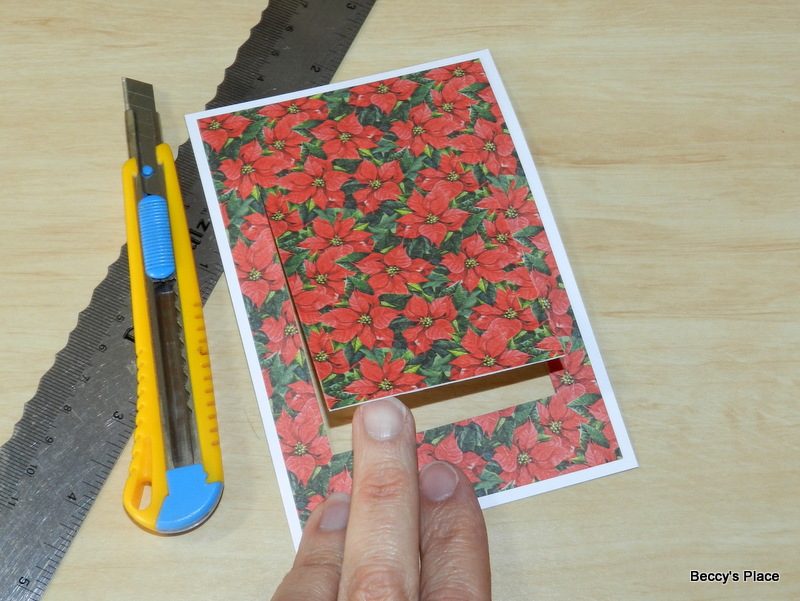
2. Use glue or double sided tape to secure the patterned paper to the piece of cardstock leaving a small border around all four edges.

3. Turn the cardstock over and mark out the cutting and scoring lines for the mechanism of your card. See the template for measurements and placement.


4. Cut along the three cut lines, ensuring your knife or trimmer blade go through both the cardstock and the patterned paper. You've now created a window cover in the front panel of your card.
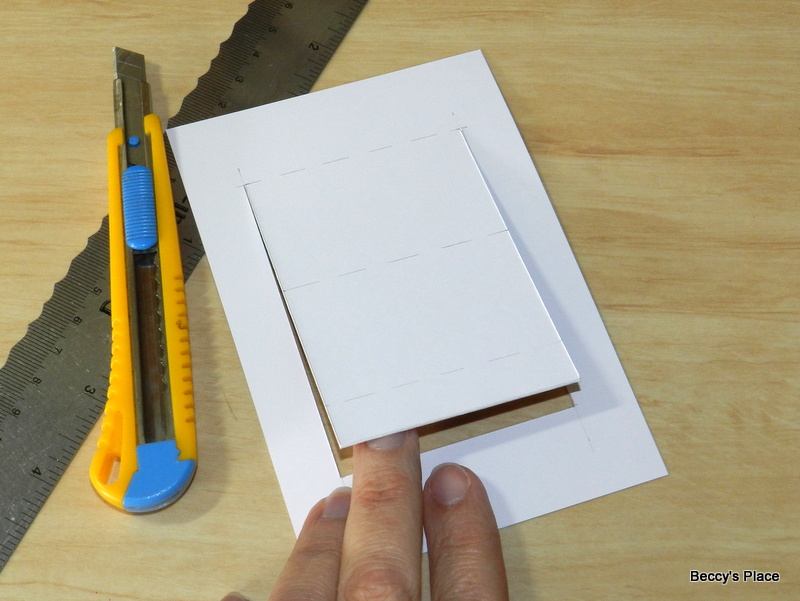
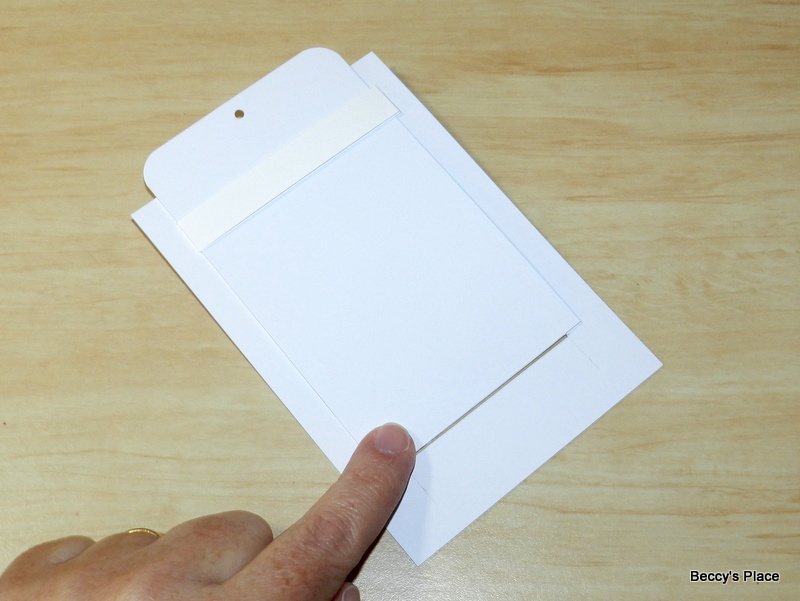
5. Score along each score line, then fold, pressing each crease firmly.


6. Cut a large tag measuring 3" x 5" from a piece of cardstock. If desired, round the top corners and punch a hole in the centre top.


7. Cut a long piece of cardstock measuring 71/4" x 1/2" and loosely fold it around your tag. There should be plenty of room for the tag to slide easily through the loop. Secure the loop with glue or double-sided tape.


8. Slide the loop off the tag and secure it to the back of the window panel, just above the first score line.

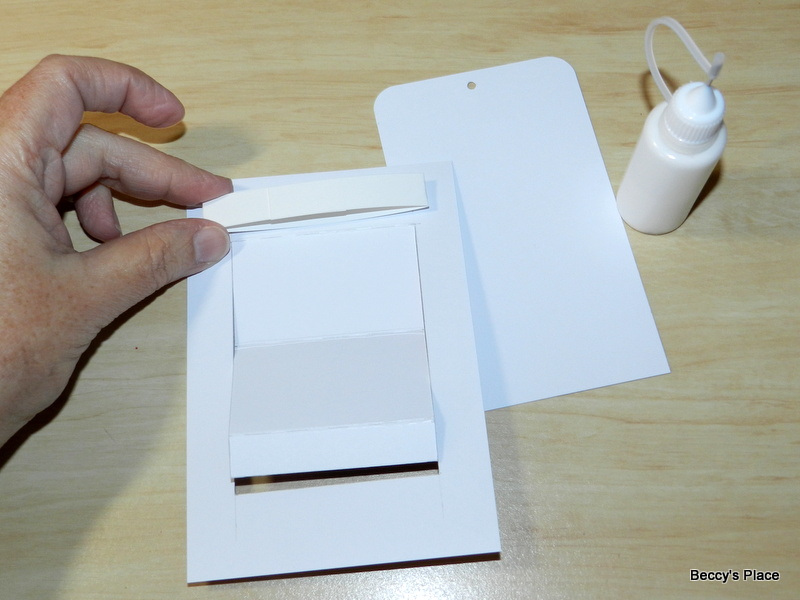
9. Once the glue is dry, slide the tag into the loop.

10. Apply glue or double-sided tape on the 1/2" section at the bottom of the window cover. See the photo below for correct placement.

11. Slide the tag down over the adhesive until the bottom edge is flush with the bottom edge of the window cover. Press in place to create the pop-up mechanism.

12. The front panel will eventually be fixed to the card front. Once the mechanism is activated, the window cover will slide back to reveal a hidden message or image. This message is actually located on the card blank. I used a panel of cardstock measuring 3" x 4" with a sentiment positioned at the bottom edge. If you prefer, you can stamp directly onto the card blank.


13. Use glue or double-sided tape to secure the front panel onto the card base. Position the adhesive down the left and right side of the panel, along the bottom edge and on the cardstock loop. I have marked the adhesive location in the image below. Secure the front panel to the card blank and allow to dry completely.

14. To decorate, add an image to the pop-up easel, taking care to only add the adhesive to the middle panel of the window cover. Tie a piece of ribbon or twine through the hole in the tag and add a sentiment if desired.


Stamps:

8 comments:
I am so glad for this tutorial. I saw one that was made using dies and I couldn't figure out how to do it without them. Hopefully I can find some time soon to try this one out.
Great card, beautiful DP, thank you for the tutorial!
Love this! So, so cute! If I get brave, I will try this tutorial - I love the outcome but I am challenged when it comes to fancy folds.
Super tutorial again Beccy, I LOVE the cat(s).
Faith x
What a fun fold, thanks for the tutorial. xx
Cute card. Thank you for the tutorial.
I love this fun fold card and I must give this one a try...
Great looking card, thanks for sharing it.
Fun card design, Beccy! I need to give this a try. Thanks for the great tutorial.
Post a Comment