Friday, May 10

Tutorial - Magic Rain Shaker Card


I'm going to say from the outset that even though I love the effect these little seed beads give, this card is a one-and-done for me. It wasn't an overly complicated card to create, but it was definitely fiddly and time consuming. On the plus side, it can be created in any size and is easily personalised with images and sentiments. 


1. Print or stamp an image onto a piece of patterned paper. (You could ink or colour a background if you prefer). Secure the image onto the front of a card blank, leaving a small space at the top and bottom and borders on the sides if you wish. (For those who are curious, I used an A5 card blank).


2. You'll need thread that is either clear or matches the background of your image, and a roll of foam tape. Apply a length of the tape to the top and bottom of your card. I also added small pieces on each side to give my patterned paper a little more support.


TIP: If you want your "rain" to come down evenly along the card, use a ruler to measure the distance between each piece of thread. I wanted a more random look so spaced the thread unevenly.


3. Start by securing a thread to the top piece of foam tape with the length running down the card. It needs to be at least an inch or so longer than the card.


4. Thread seed beads onto the strand using a needle if necessary. I used between 3 and 10 beads per length for a random pattern.


5. Press the end of the thread into the foam tape at the bottom of the card. Take care to keep the thread taut without pulling it off the top piece of foam tape.


6. Repeat the process with more thread and more beads. As I mentioned above, I'm randomly spacing my threads and applying between 3 and 10 beads per length. If you prefer, you can be more consistent with the placement and number of beads.


7. I added glue to the thread to help secure it to the foam tape as I worked.


8. Once you've threaded the beads on each strand of thread, add another layer of foam tape to secure the threads in place and allow room for the beads to slide. (The small pieces will also require a second layer of tape).


9. Trim the ends of the tread, then add patterned paper over each end of the card. Embellish as desired. When you tilt the card, the beads should slide freely down each thread creating a cascade of little "raindrops".


Digital Stamps:

Wednesday, May 8

Sending Smiles


Kathy has combined the images from the new Pond Pals set of digital stamps with wonderful photo backgrounds, sentiment flags and some cute little embellishments. She's used some white gel pen for the "waves" around the bottom of each critter, which help to anchor them into the scene.


Monday, May 6

Best Wishes

I created the background for this card by brushing some water-based inks over a piece of watercolour paper, then stamping over the top with the same inks and the small bouquet of flowers from the Cosmos set of clear stamps. I used the large stamp from the same set to add flowers down the right hand side of the panel, then coloured with white pencil to make them a little more vibrant.


Stamps:

Saturday, May 4

Love Is In The Air


Using a consistent colour scheme is a great way to create card sets, as Cynthia has done with these two beauties. Black, white and red always look great together and are perfect for birthdays, anniversaries and Valentine's Day.


Friday, May 3

Tutorial - Daisy Crowns


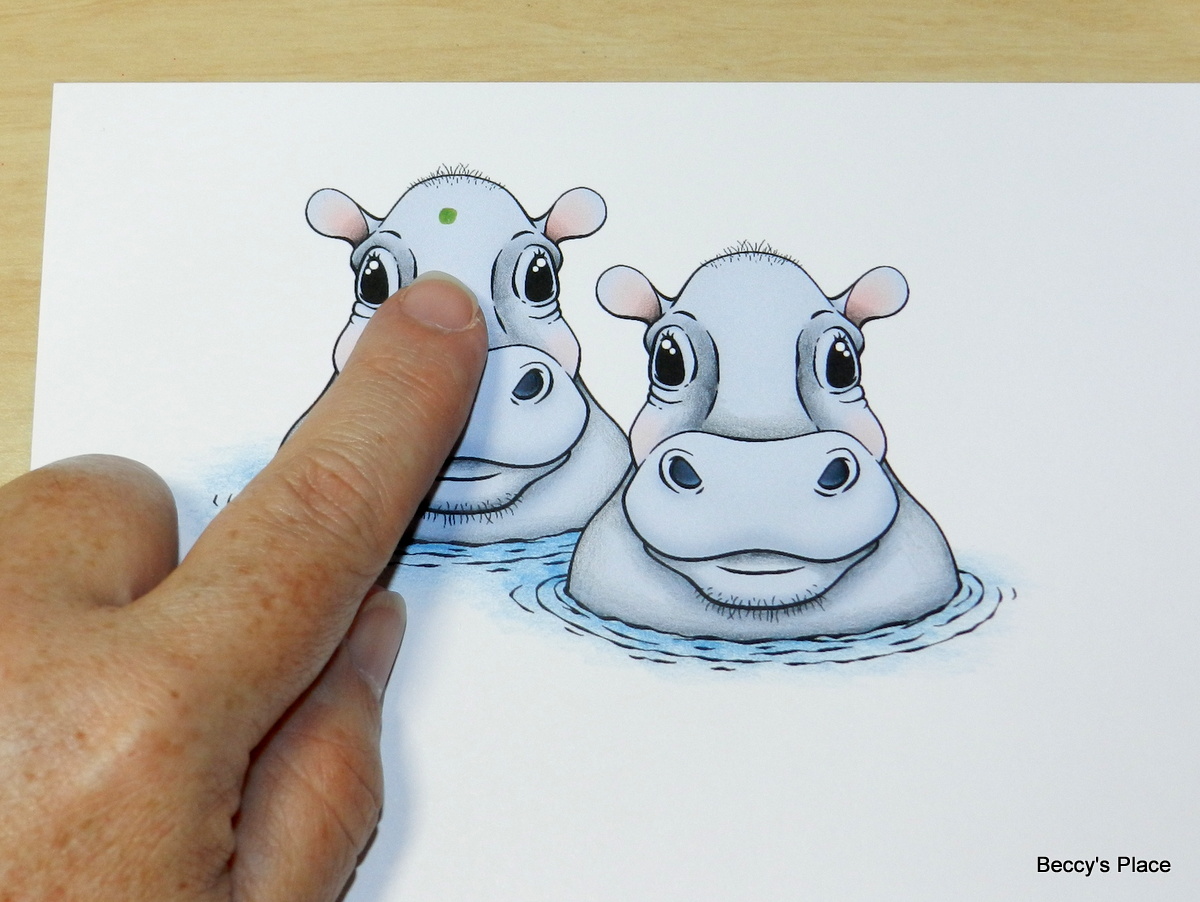
I enjoy adding little additions to stamped images. It's a great way to personalise them or even change the theme so they can be used for a wider variety of occasions. Today I want to show you a simple way to add a crown of daisies to the hippo image from the Pond Pals digital stamp set.


1. Start by printing the image onto cardstock. I used the pre-coloured version with a little additional coloured pencil to deepen the shadows and colour the water.


2. Select some colours for the centres of your flowers. I've used alcohol markers, but you could use a spot of coloured pencil, liquid pearls or even little rhinestones if you prefer.


3. Add a dot of colour on the first image. Always work from the centre front of the characters head, as this is the flower that will sit furthest forward with the others tucking in behind on either side giving the illusion of depth.


4. Use a fine line black pen to trace around the dot. It doesn't have to be neat and tidy and the ends don't have to meet.


5. Now add some "petals" with a white pen. Again, don't worry if they're a bit wobbly and the shape is a little off... in fact, simple lines will also work.


6. Use the black pen to trace around each petal.


7. Repeat the process for the flowers on each side of the first one, remembering to tuck some behind the ears and sides of the head.


8. Repeat the same steps for the other image. If you wish, you can also add little dots of the black and white pens to the centre of each flower.


Digital Stamps:

Thursday, May 2

April Challenge Winners

Congratulations to the April Challenge Winners!
Granne (32), Gail Jean (1), and Suzana (22)
You are the randomly chosen winners of last month's challenge.
If you already have a Beccy's Place store account, I'll be adding a $20.00AU credit very soon.
If not, please email me at beccy@beccysplace.com to claim your prize.

Wednesday, May 1

New Digital Stamps


New Designs for May

Rainy Days
digital stamps


Pond Pals
digital stamps

Sweet Peas


Original artwork by Beccy Muir, all rights reserved. Images are for personal use and must not be copied, swapped, shared, resold or mass produced without the express written permission of the artist.


May Challenge


Create a card or paper-craft project using any Beccy's Place image, upload a photo of it to your blog or other hosted site, and submit a direct link below. The challenge runs from now until midnight on the 31st of May 2024 (AEST).


To keep things interesting, I'll be adding an additional optional element to the monthly challenges.
This month, it's Flip-A-Coin!


PLEASE READ THE CONDITIONS CAREFULLY
BEFORE ENTERING THE CHALLENGE
  • Entries that don't meet the conditions will be deleted from the challenge.
  • Your project must be created during the month of May 2024 and entered into the challenge during the active challenge period. Due to an automated system, late entries cannot be accepted.
  • Each month I will offer a free digital image and suggest a bonus challenge, such as a card sketch, bingo grid, etc. You DO NOT have to use the image or bonus challenge on your project, but you MUST use a Beccy's Place image, either free or purchased, to be eligible for entry.
  • You can enter as many times as you like and you can submit your card to any other challenge you wish.
  • At the end of the month three different random winners will be chosen to receive a $20.00AU store credit for any digital stamps at Beccy's Place. To redeem the store credit, winners must have a Beccy's Place customer account. (Please note, you do not need an account to enter the challenge. It is acceptable to create an account in the event that you win. Accounts can be closed at any time.)
  • Store credit won during any Beccy's Place challenge is redeemable for digital stamps in the Beccy's Place online store.
  • Entries can be uploaded to the challenge from any hosted site including blogs, online galleries, Google photos, etc. If you do not have access to a hosted site, please feel free to email your photos to me and I will add them from the Beccy's Place Guest blog.
  • Beccy's Place designers may enter the monthly challenge but are not eligible to win prizes.