Friday, April 10

Day Ten


COLOUR CHARTS
(pencils and markers)
Keeping colour charts for your pencils and markers is a handy way to choose colours for your projects. When I'm selecting colours, I place the patterned paper I want to use next to the colour chart so I can see what colours co-ordinate and contrast. The colour chart, printed on the appropriate paper (e.g.: blending card for alcohol markers) and coloured with the actual pen or pencil, gives you a much more accurate indication of what your going to get. Sometimes the colour swatches on pre-coloured charts or even on the lid of the pen, don't show the colour you end up with.

Aside from being handy for colouring projects, colour charts also give you a visual record of what you own, making inventory keeping a lot easier.


Below are the two charts that I use for my markers and coloured pencils. To find more, head over to Google and search for "blank colour charts" for whatever medium you want. For example, if I wanted a colour chart for Tombow markers, I'd search for "Tombow markers blank colour charts". Pinterest has LOTS of colour charts for various mediums, so that might also be a good place to search.


Tutorial - Free Standing Pop-Up Card


These fabulous cards pop open to reveal a festive display that will stand up proudly throughout a special holiday or event, and they even fold completely flat for postage in a standard size envelope! 


SCORING TEMPLATE

1. Place a piece of card stock measuring 11" x 41/4" horizontally on your score board and score at 1" 23/4", 33/4", 51/2", 71/4", 81/4" and 10". Fold along all the score lines.


2. Make a vertical cut at the 51/2" score line that is 3/4" from the top and 3/4" from the bottom of the card stock. See the template above for correct placement.


3. Prepare your sentiment panel. Start with a piece of card stock measuring 51/2" x 23/4" and decorate as desired. Keep the surface of the card stock smooth so that it can slide up and down the cut you made in step two - don't add any embellishments, foam tape or card stock cut outs. I added a coloured image that is slightly smaller than the piece of card stock.


4. Place the 51/2" x 23/4" piece of card stock into the slot you cut in step two. It should be a snug fit, but still able to move. If it's too tight, cut the slot a tiny bit at either end.


5. I've added pencil marks to the areas of the card that require adhesive. Use wet glue to give yourself time to manoeuvre everything into position.


6. Fold the card in half where the slot was cut. Your image panel should still be in place. The panels on each end of the card will be folded in and adhered together with the bottom of the image panel sandwiched firmly between.


7. We'll start by adhering the image panel to one side of the card. Add some glue to the panel that's resting on your desk and centre the image panel over the top, keeping the bottom edge flush with the edge of the card base.


8. Apply more glue along the entire length of the bottom panel including a small section of the image panel as shown below. Press the two sides together firmly and allow to dry completely.


9. To decorate, cut some patterned paper into strips. You'll need two strips measuring 4" x 3/4" and four strips measuring 4" x 11/2". Adhere them around the card base leaving a small, even border around each strip.


10. Once your card is completely dry you can try out the pop-up feature. Press gently but firmly on the middle fold where the slot was cut. The card base will form a little box that acts as a stand for the image panel.


11. The last step is to add some embellishments. Avoid the area on the image panel that slides in and out of the slot as it will prevent the card from opening and closing properly. You can add some die cuts on the outside of the box and the very top of the image panel, and you can also add some ribbon or twine around the top of the box if you wish.


Stamps:

Thursday, April 9

Day Nine


CLEAN MACHINE!
It's time to perform some routine maintenance on all the machines in your craft space. Clean plates, replace blades, oil moving parts... whatever is required. Most machines come with an instruction book that includes a section of basic maintenance and cleaning. Be sure to follow the guidelines so you don't void warranties or harm yourself or your machine.


Don't forget your smaller items, such as hot glue and heat guns. Heat guns suck in air and will often accumulate dust around the intake vents. A soft brush will clear most of that out. While you're at it, include maintenance on some of the other machines you own that aren't necessarily related to paper craft, such as sewing machines and printers.


Wednesday, April 8

Day Eight


WITHIN REACH
(A basic kit at your fingertips...)
A good work space is an efficient work space, so let's spend some time setting things up. Each person will have a different idea of what works best for them, so read all the tips and then decide for yourself how you like things arranged.


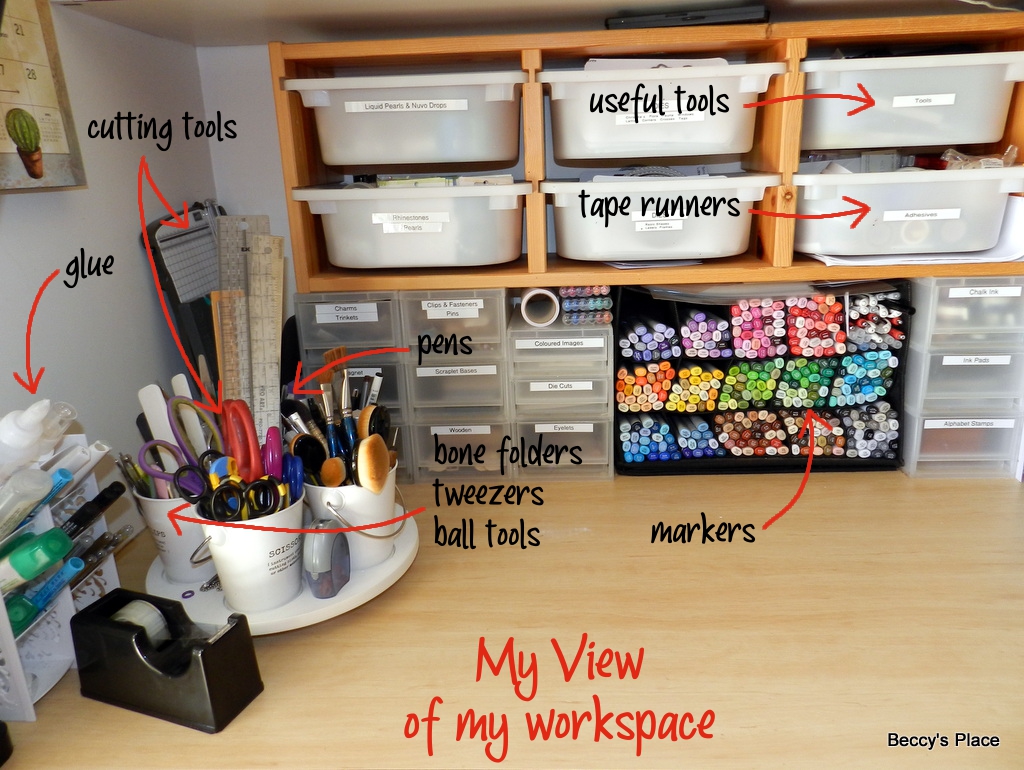
Personally, I like to have all the things you'd find in a basic kit at my fingertips. Again, what constitutes a basic kit varies from person to person, but I consider it to be comprised of the following items:
  1. Something that cuts
  2. Something that adheres
  3. Something that writes
  4. Something that grabs/holds
  5. Something that measures


When I sit in my work space, I have basic items within easy reach, including scissors, trimmers, glue, pens, tape runners, markers, clips, tweezers and rulers. These are the basic things I use for almost every project I create. In addition, I have bone folders, pencils, markers, a heat gun, ink pads that I use regularly, small embellishments, scrap paper, and a basket of stamps close by.


The remainder of my collection is in boxes and drawers around the room. Items that I don't use as often, such as different coloured stamp pads, re-inkers, chipboard, 12 x 12 card and paper, ribbons, twine, flowers, etc. It's really a matter of personal preference.

There are lots of different ways to store the items you use in your workspace too. I have chosen an ecclectic mix of furniture that I have collected, replaced and refined over the years - shelves from Ikea, baskets from craft fairs, organisation boxes from office supply stores, online shops and bargain centres. It's about finding what works for you.

Celebrate the Season


Easter is just around the corner and today Judy is sharing some of the fabulous cards she created to celebrate the holiday and send joy and good wishes to her friends and family.


Judy has used lots of lovely soft colours for these projects, which are traditional at Easter and reminiscent of spring flowers. The beautiful bows on each card are great decorative elements as well as performing the practical task of anchoring the little sentiment tags. She has carefully fussy cut each of the characters from the Easter Joy set and popped them up for some extra dimension.


Judy has kindly shared a project colour guide for each of her beautiful cards.
To see more of Judy's work, click the link at the bottom of this post to head over to her blog.


Tuesday, April 7

Day Seven


LOOKING SHARP!
Performing regular maintenance on your blades, cutters, trimmers, guillotines and scissors will keep your cuts straight and even and will also help to protect you from injury. Working with a dull blade or knife has proven more hazardous given that extra pressure is required to make a cut.

Spend today replacing dull blades, sharpening knives and scissors as needed. Remember to follow manufacturers instructions when sharpening your tools, particularly expensive shears, as they can be ruined beyond repair if not maintained correctly.


I own a LOT of cutting implements, but my favourite is this inexpensive, plastic, refillable craft knife I purchased about 10 years ago. Thankfully, I bought several containers of blades at the same time, which should keep me cutting for the next 100 years or so!

Have you ever found an inexpensive, humble tool that has become a favourite?