Showing posts with label santa. Show all posts

Saturday, November 2

Day 2 - "B"

Bargello is a great technique for using up paper offcuts, and it also happens to begin with the letter "B", which is handy in an alphabet challenge. But just to be on the safe side, I also coloured dear old Santa with blue, black, brown, and beige markers.


YOUR TURN: Create a card using the letter "B" as your prompt.
Click on the link below to add your project to the challenge:

INSPIRATION WORDS:
Blitzen, boots, bows, box cards, bendy cards, building block cards, bleaching, beads, brads, burnishing, blue, brown, black, baubles

Digital Stamps:

Saturday, November 25

Day 25 - "V"

To give my image a vintage vibe, I selected earth-toned markers for everything except his beard, which was coloured with warm greys. I also brushed a little ink around the edge of the image panel before removing the cutting die.


YOUR TURN: Create a card using the letter "V" as your prompt.
Click the link to upload a photo to the challenge:

INSPIRATION WORDS:
Vintage, Vixen, visitors, view-master card, Venetian blind card, velvet, vermilion, violet, verdigris, vellum

Digital Stamps:

Wednesday, November 1

New Releases


New Digital Designs

Santa Claus
digital stamps


Peace and Light
digital stamps

Tuesday, November 15

Day 15 - "M"

I used pencils to colour a partial image of Santa on kraft cardstock, then added a Merry Christmas sentiment to complete my project. You might have already guessed that there's a second card using the other half of my image... it's another technique I really enjoy and a good way to add extra cards to the stash!


YOUR TURN: Create a card or papercraft project using the letter "M" as your prompt.
Click the link below to add a photo of your creation to the challenge:

INSPIRATION WORDS:
mistletoe, mittens, mouse, manger, merry, Mary, matchbox card, magic window card, markers, masking, menorah, metal, microbeads, mixed media, mauve, magenta

Stamps:

Sunday, October 16

Fun and Festive


Fabulous seasonal papers, bright colours and cute images and the perfect mix for great Christmas cards... and Judy's creations have it all! She has used the bonus snowman and Santa images from the Cozy Christmas set of digital stamps to make her fabulous projects.


Did you take a close look at her Santa card? Notice something a little different from the original image? That's right! Judy added "eyes" to her Santa by colouring over his laugh lines. How creative is that?!

Saturday, October 15

Card Toppers


The images from the Cozy Christmas set are a great size and shape for complete card toppers, which is especially handy for those of us who enjoy creating clean and simple cards. You can resize the images for bigger or small cards, and there's also the option of using the pre-coloured versions if you're in a bit of a hurry.


You can easily print the images onto a card blank, add some colour (or print the coloured version), and you have a one layer card. Just keep in mind that some colouring mediums, such as alcohol markers, may show through the cardstock making them unsuitable for a one layer card.


I've opted to create three individual card toppers rather than a one layer card. This means I don't have to worry about any of my markers bleeding through to the back of the cardstock.


I used alcohol markers to colour each image, adding a little bit of white pen to Santa's beard and hat for some added texture.


Next, I fussy cut the images leaving a tiny white border around the edges. As you can see, I also removed the extra cardstock from inside the candy cane frame, which will allow the background to show through.


I chose to mount the Santa image on silver mirror cardstock, which coordinated with the silver pen I used on the frame.


The moose image has been mounted on gold cardstock to match the gold pen I used on the bells.


For the snowman image, I embossed a piece of white cardstock with a dotted texture rather than using mirror cardstock, which gives the impression of snow falling.


Stamps:

Friday, October 7

Gift Tags

The images from the Cozy Christmas digital set are perfect for creating cute little gift tags, and it's super easy to print a whole sheet in one go. I used the pre-coloured versions, added a "to" and "from" and then raided my mediums for anything shiny or sparkly! The little borders were hand drawn with a black fine point pen.


Stamps:

Monday, October 3

Santa Card

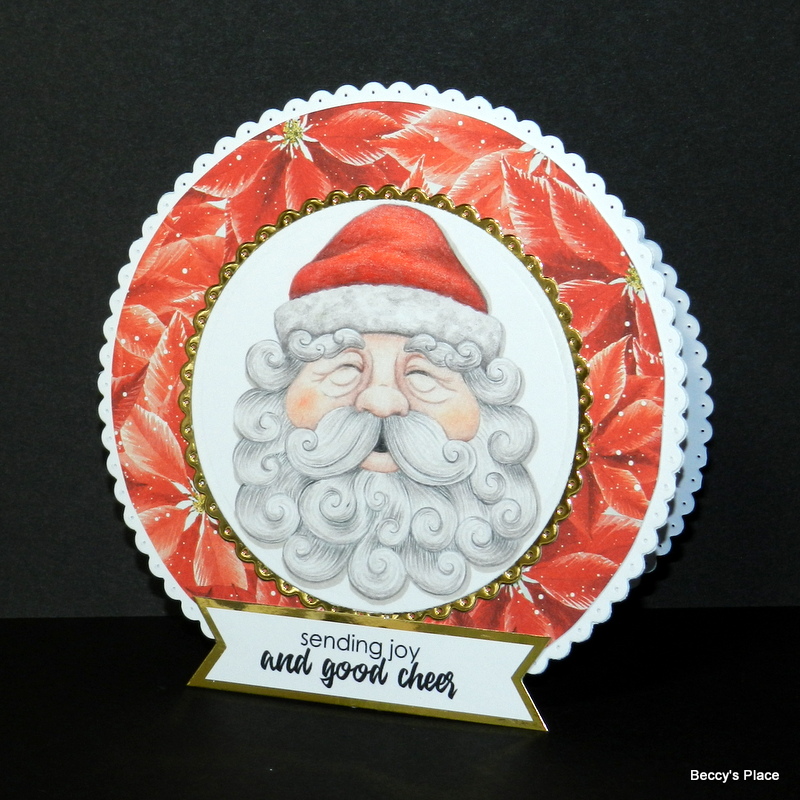
There's something you don't know about the new Cozy Christmas set of digital stamps... it comes with three bonus images of the characters without their frames! I've used the Santa image for today's card, coloured with pencils and mounted on a circle card. I placed the sentiment at the very bottom, flush with the edge, to help give the card some stability while standing up.


Stamps:

Saturday, November 20

Day 20 - "R"

Nobody can pull off a red outfit quite like the big guy himself - Santa Claus! This image is from one of our older sets and I've coloured it with alcohol markers for a lovely vibrant result.


YOUR TURN: Create a card using the letter "R" as your prompt.
Click on the link to upload a photo of your creation:

INSPIRATION WORDS:
Reindeer, Rudolph, red, rejoice, reunion, rocker card, ribbons, rubber stamps, royal blue, ruby.


Stamps:

Tuesday, December 1

Quilted Santa


Remastered: December 2020
Original artwork by Beccy Muir, all rights reserved. Images are for personal use and must not be copied, swapped, shared, resold or mass produced without the express written permission of the artist.

Thursday, November 9

Day 9 - "H"

Santa's famous catch cry is the theme for my card today...
Ho Ho Ho!


YOUR TURN: Create a card using the letter "H" as your prompt.
Click on the link to add a photo of your creation:

INSPIRATION WORDS:
holly, ho ho ho, happy, holiday, hot chocolate, hope, handbag card, heat embossing, herringbone technique, honeycomb paper, hexagons, hot glue, heliotrope, harvest gold, hookers green, hunters green

Stamps: Skating Santa

Thursday, December 8

Tutorial - Wiper Cards


A Wiper Card is a form of pop-up card with a swinging tag that pops out when the ends are pulled. You can use the tag to hold a sentiment, like I did, or perhaps a fun little embellishment that fits the occasion.


1. To make a 6" x 4" folded card you will need two pieces of card stock measuring 4" high x 9" long and one small piece measuring 3" high x 11/2" wide.


2. Place one of the 4" x 9" pieces of card stock horizontally on your score board and score at 11/2" and again at 3", create a valley fold on the first score line and a mountain fold on the second. Repeat for the second piece of card stock.


3. Turn one piece around so the folds are at the other end. Set them aside.


4. Place the 3" x 11/2" piece of card stock vertically in front of you. Measure 11/2" down the right hand side and place a little mark. Use a ruler and pencil to draw a line from the mark to the left hand corner, as shown in the photo below.


5. Score along the pencil line, then fold. Rub out the pencil line.


6. I used a pair of sharp scissors to round off the top of my tag. Although it's not necessary, I find it helps the tag slide in and out of the card a lot easier. Flip the tag over so that the fold line runs from the left hand edge down to the right hand corner. Decorate the top of the tag as desired.


8. Place one of your long pieces of card stock horizontally in front of you, with the wrong side facing up. The fold lines should be on the right hand side. Add some glue or adhesive tape to the section of the tag below the fold line. 


9. Adhere the tag to the card between the two score lines as shown in the photo below. The tag should be parallel with the card and have its fold line flush with the top edge of the card. When you turn the card over you should not be able to see the fold on the tag.


10. Apply double sided tape or glue to the end panel of each card, as shown in the photo below.


11. Remove the backing paper and adhere the two pieces of card stock together, with the tag between them.


12. Now you can decorate the card as desired! I used patterned paper, ribbon, white card stock, die cut trees and a digital stamp to finish my project.


Stamps: