Showing posts with label Beccy's Place Patterned Paper. Show all posts

Tuesday, June 3

More Scrappy Backgrounds

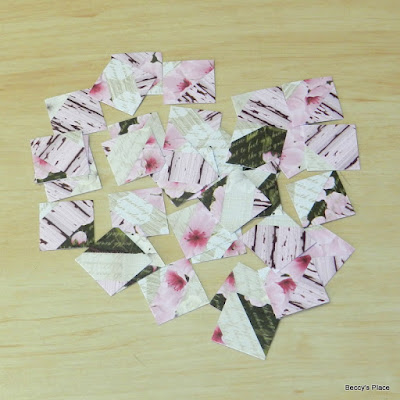
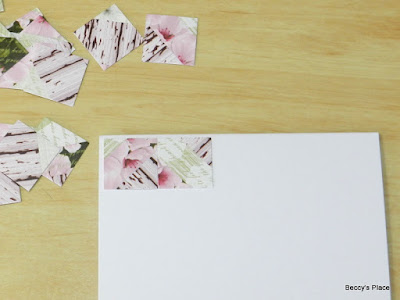
Last month, I shared a tutorial for creating backgrounds with strips of scrap paper. Today I'm back with another idea, but this time we're using those little pieces that are a bit small on their own, but together, can make an awesome display! I used a small, hexagonal cutting die to cut as many shapes as I could from the offcuts I had in my drawer. Then I arranged them in different ways to create three pretty card fronts. You could create similar effects with squares, triangles or octagons... or whatever shape punches and dies you have in your stash. 


Products:

Wednesday, May 28

Wren and Blossoms

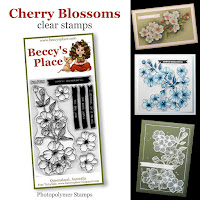
The little birds from the Blue Wrens set coordinate beautifully with the Cherry Blossom flowers, with the pretty pinks and bright blues creating a fantastic contrast. I added a border of shiny pearls, some silver mirror cardstock, and an embossed sentiment to give the design a nice lift.


Products:

Thursday, May 22

Tutorial - Scrappy Backgrounds


Paper scraps and offcuts are almost inevitable when you're a paper crafter, but they don't have to end up in the bin. Today I want to share a simple idea that uses all the long strips of paper that I always seem to end up with when crafting. I've shared a similar idea before, but this time I'm taking it a couple of steps further for an interesting effect.


1. First, secure the long strips side-by-side on an angle. I've attached mine to a scrap piece of printer paper that I cut to about an A6 size (the size of a card front). I then trimmed it to 10cm x 14cm.


2. Cut the paper into 2cm strips, then cut each strip into 2cm squares.


3. Secure each square to your card, alternating the direction of the angle. For example, on the first square the paper strips are angled upward from left to right. On the second square, the strips are angled downward from left to right. Continue alternating until you have completed an entire row.


4. Start the second row with the strips facing the opposite way to the one above, then continue alternating in the same manner until your entire card front is covered. You'll end up with a background that looks a little like parquetry. 


I created a second background (below, right) by cutting 2cm strips, rotating the 2nd and 4th by 180 degrees, and layering them side by side, which also gave me a pretty effect. All that's left to do now is decorate!


Products:

Friday, May 9

Cherry Blossom Patterned Paper


A beautiful range of high quality patterned papers featuring
one of our most popular image sets - Cherry Blossoms.

Saturday, April 26

Layout - "Boyhood"

I actually spent some time creating a scrapbook layout today, but I think the design would also be great for a card... just on a smaller scale. I used a combination of the toned images from the Blue Wrens cut sheets plus torn strips of patterned paper to create a vintage-looking page. Some black Nuvo drops and pieces of twine add a little more texture and offer a nice contrast to all the straight lines.


Products:

Friday, April 11

Tutorial - Accordion Z-Fold Cards


I recently taught this fabulous display card at one of my local scrapbooking shops. It has an accordion section that helps it stand open for display as well as a smaller card that keeps everything in shape. You could easily adapt the size to whatever you need and there's plenty of room to add personal messages and sentiments.


1. Place an 11" x 51/2" piece of cardstock horizontally on your score board and score at 13/4", 31/2", 51/4", and 7". Fold along the score lines, alternating between mountain and valley folds to form a concertina. Set aside.


2. Place a 61/2" x 31/4" piece of cardstock horizontally on your scoreboard, and score at 31/4". Fold in half.


3. To decorate, you'll need a 33/4" x 51/4" piece of white cardstock for the inside of the card, two 3" x 3" pieces of patterned paper, four 11/2" x 51/4" pieces of coordinating patterned paper, and a 1" x 33/4" piece of patterned paper (optional).


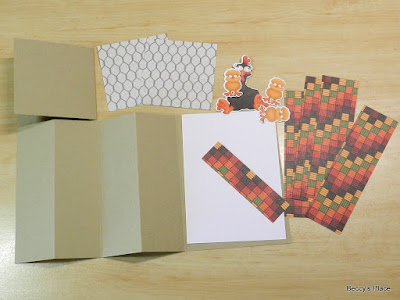
4. Adhere all the paper and cardstock to the base cards as shown below. If using the 1" x 33/4" piece of patterned paper, reserve it for a little later.


5. Fold the small card in half and position the folded edge along the right hand side of the large card. Open the small card.


6. Place adhesive along the left hand edge of the small card, about 1/2" wide. Carefully bring the accordion section over the adhesive, ensuring the small card doesn't move.


7. Now fold the accordion section closed as shown below. Place adhesive on the right hand edge of the small card and, if desired, a little on the edge of the accordion section ensuring you don't extend beyond the width of the small card. Fold the small card closed, securing it to the accordion section.


8. To decorate, secure the 1" x 33/4" strip of patterned paper to the white cardstock, about 1/2" from the bottom so that it's visible when the card is closed. I added a sentiment at the top right-hand side of the white cardstock, placing it carefully so it can be seen when the card is folded.


9. Decorate the front panel of the small card as desired. I used a combination of die cut images and another sentiment.


Products: