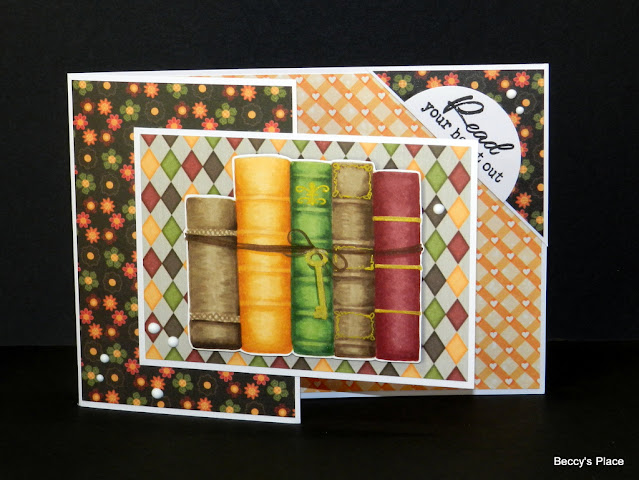
A basic card with a fun pocket closure that can be adapted to almost any size and shape. You can move the pocket to either corner and you can orient your card horizontally or vertically depending on your overall design.
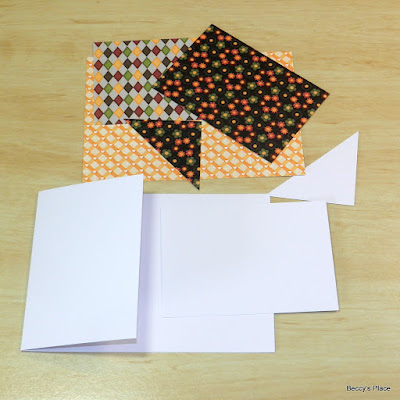
1. Start with an A5 tent-fold card blank (or 4" x 6" if you prefer).
2. Cut the front of the card in half. The part you cut off becomes the front panel of your card.
3. You'll also need a triangle of cardstock for the pocket. I started with a 21/4" square of cardstock, and cut it in half on the diagonal. (You don't have to make it quite as large as I did, but you must ensure the corner of your front panel can tuck inside the pocket.)
4. Cut several pieces of patterned paper for the different pieces of cardstock. I keep mine slightly smaller than my cardstock so I'll have a narrow border around all the edges. You can choose coordinating pieces or use the same design on all sections if you prefer.
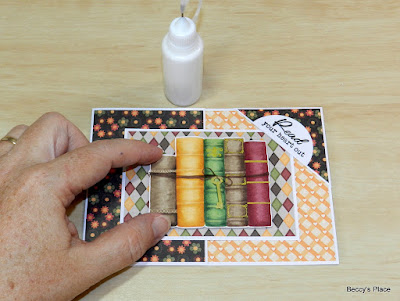
5. Place glue on the back of the panel, ensuring it only covers half the area. Secure it to the front of your card making sure none of the adhesive has drifted over to the right side - you don't want to glue your card closed!
6. Apply glue on the 90 degree angle of the triangle piece, leaving the long edge clear. I've added pencil marks so you can see the correct placement for the glue. The triangle will form the little pocket to hold your card closed.
7. Decide on the placement of your pocket. I've positioned mine at the top, right-hand side of the card, securing it to the inside edges of the card. Allow the pocket to dry fully before opening and closing.
8. Now decorate! I used an image from the Old Books set of stamps as well as one of the sentiments.
Products:


No comments:
Post a Comment