


Today I want to share a quick and easy technique for masking parts of your stamp rather than masking your card. We're also going to create a fun, interactive card with a hidden message.


Today's tutorial is specific to the "Blooming Tools" stamp set I'm using. However, you can use the techniques with most other images as well, particularly the masking, which will work with any stamp.
1. Place the jar of tools stamp on a large acrylic block.
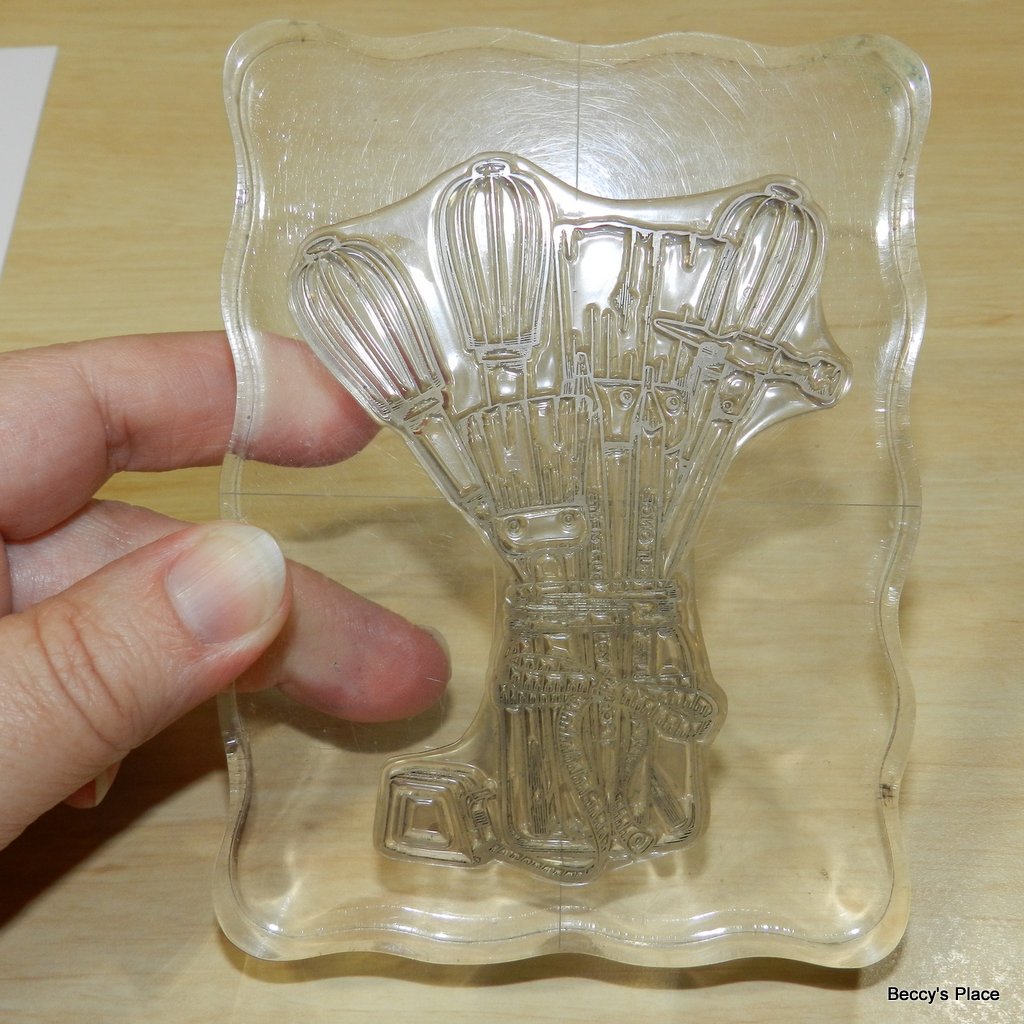
2. We only want the jar, not the tools sticking out the top, so we're going to mask off the section we don't need. Grab a piece of clear tape and place it as close as you can to the line at the top of the jar (see photo below).

3. Apply your ink to the lower half of the stamp. As you can see, any ink that goes above the area you want will end up on the tape effectively acting as a mask.

4. Remove the tape and discard immediately. Be aware that the ink on the tape will stay wet for quite a long time so take care not to get any on your work area.

5. Stamp the image as per usual. As you can see from the photo below, only the bottom section of the image is transferred.

6. Repeat the process, this time masking the bottom section of the stamp and only transferring the tools. Take care to CLEAN your stamp thoroughly between the two images or you may end up transferring more ink than you intended.

7. Once you've stamped the tools, draw two vertical pencil lines straight down your card stock. This will form the "tag" when you fussy cut this section.

8. Colour the two images.

9. Fussy cut around the tools. I always recommend starting with any inside pieces then moving on to the perimeter.

10. Cut around the tools and down either pencil line to form a tag. The uncoloured portion of mine is about 3/4" wide and 21/4" long.

11. Use a craft knife to cut a slit along the top of the jar. Remove a tiny amount of card stock by cutting a second line slightly above the first and pulling out the inside. The tag will slide better with this wider opening.


12. Stamp sentiments on the tag and on the card front as desired. I also added a border with black pen and a ruler.

FLIP THE CARD STOCK OVER

13. To prevent the tag from being completely removed from the card we're going to add a strip of card stock that is wider than our opening.

14. Secure a piece of card stock that is 11/4" long and 1/4" wide to the bottom of the tag with strong glue or double sided tape.


15. The card looked a little stark to me, so I added some paint spatters and a little more shadowing around the jar. It's much easier to add these details before the card is assembled, so try to figure that out a bit earlier than I did.

16. I used double sided foam tape to secure the card stock to my card blank. Be sure to keep any adhesives well clear of the tag and the area it slides through.

Photos and written instructions are copyright Beccy Muir.
All rights reserved.
Stamps:
17 comments:
Love this image, the colours you used and the splatter!!
Enjoy your weekend,
Colinda
Such a great technique and the card turned out awesome...love the splatters.
Well done Beccy and tfs
Thank you for the tutorial Beccy! What a great technique.... my to do list is getting very long :).
The card is beautiful. Love your choise of colours and the splatters are great!
Have a lovely weekend.
Brilliant card, what a great technique! Thanks for the tutorial. xx
Great technique. Your card turned out lovely. I had to laugh at your comment about adding the paint splatters as I would have done the same as you!
What a great technique - it could well be used with a container of flowers too. Thanks for the tutorial Beccy
Blessings
Maxine
As always you cerate such lovely cards this is so beautiful and that stamp is perfect x
Great tutorial! Just love this card, thank you for sharing.
Great tutorial! Just love this card, thank you for sharing.
Such a great idea Beccy. Thanks for the tip!
Karin
xxx
How neat! I may try this with a vase of flowers, too! Thank you!
Geweldig!!!
Hi Beccy this is a stunning card I love it. That is a great technique. Take care. Hugs Jackie
Brilliant idea. Awesome inspiration. Thanks!
Like the splatters in the background- great masking technique too - TFS
I agree - just a brilliant idea!
Thank you for your tutorial, Beccy!
SUPER COOL, SUPER CREATIVE card Beccy!
... I have had rather unsuccessful attempts at masking stamps, feel SO INSPIRED now, so I know I will be giving it another try => THANK YOU :)
Post a Comment