Saturday, March 4

Masculine Card

The Book Lovers set of digital stamps has a number of mix and match images that allow you to build up a little scene. I've used one of the book stacks plus the cup and old-fashioned glasses for this card, which I intend to give to one of my brothers for his birthday.


Stamps:

Thursday, March 2

February Winners

Congratulations to the February Challenge Winners!
Suzana, GranMargaret, and Teresa H.
You are the randomly chosen winners of last month's challenge.
If you already have a Beccy's Place store account, I'll be adding a $20.00AU credit very soon.
If not, please email me at beccy@beccysplace.com to claim your prize.

Wednesday, March 1

New Digital Images


Ice Cream Cones
digital stamps


Book Lovers
digital stamps

Strawberries


Original artwork by Beccy Muir, all rights reserved. Images are for personal use and must not be copied, swapped, shared, resold or mass produced without the express written permission of the artist.

March Challenge


Create a card or paper-craft project using any Beccy's Place image, upload a photo of it to your blog or other hosted site, and submit a direct link below. The challenge runs from now until midnight on the 31st of March 2023 (AEST).


To keep things interesting, I'll be adding an additional optional element to the monthly challenges. This month it's all about food, so include something tasty in your project.

PLEASE READ THE CONDITIONS CAREFULLY
BEFORE ENTERING THE CHALLENGE
  • Entries that don't meet the conditions will be deleted from the challenge.
  • Your project must be created during the month of March 2023 and entered into the challenge during the active challenge period. Due to an automated system, late entries cannot be accepted.
  • Each month I will include a re-mastered digital image from my library of freebies as well as a bonus challenge, such as a card sketch, bingo grid, etc. You DO NOT have to use the image or bonus challenge on your project, but you MUST use a Beccy's Place image, either free or purchased, to be eligible for entry.
  • You can enter as many times as you like and you can submit your card to any other challenge you wish.
  • At the end of the month three different random winners will be chosen to receive a $20.00AU store credit for any digital stamps at Beccy's Place.
  • To redeem the store credit, winners must have a Beccy's Place customer account. (Please note, you do not need an account to enter the challenge. It is acceptable to create an account in the event that you win. Accounts can be closed at any time.)
  • Store credit won during any Beccy's Place challenge is redeemable for digital stamps in the Beccy's Place online store.
  • Entries can be uploaded to the challenge from any hosted site including blogs, online galleries, Google photos, etc. If you do not have access to a hosted site, please feel free to email your photos to me and I will add them from the Beccy's Place Guest blog.
  • Beccy's Place designers may enter the monthly challenge but are not eligible to win prizes.

Sunday, February 26

Problem Solved

I'm happy to announce that the issue with the gift certificates and store credit seems to be resolved. Thank you everyone for your patience and understanding while the engineers worked on the problem. Happy shopping!

Open Space

I chose to leave a lot of open space on this card... although I have to admit, it might be a little too much and could end up with a bird or three before it actually gets used. The image was printed along with the sentiment, then coloured, fussy cut and popped up to give a little more dimension.


Stamps:

Friday, February 24

A Little Sunshine


Kathy's card features the seabirds from the new Beachside Bliss set of digital stamps. Take a look at the gorgeous ocean she has created, complete with reflections and deep shadows that give the image depth and movement. Make sure you head over to her blog for more details!


Thursday, February 23


Selected, retired digital stamps at an incredibly low price for just 48 hours.
No rainchecks. No repeats.

Cuddlebugs
digital stamps

Wednesday, February 22

Beachside Bliss

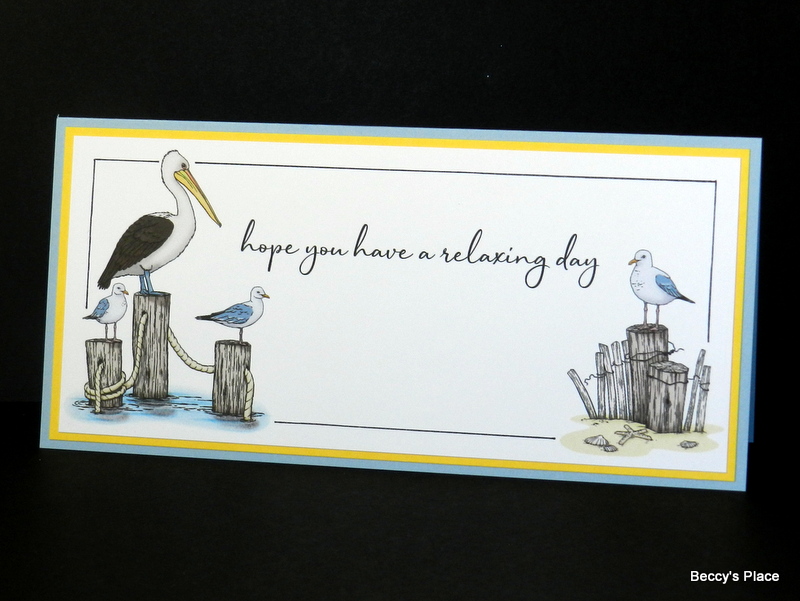
I've created a couple more cards using the pre-coloured digital images from the new Beachside Bliss set. The first card uses both images, one on either end of a slimline design. For the second card, I enlarged the pelican image and trimmed one side to fit the card front. The sentiments on both were printed at the same time with a simple MS Word program. Again, super quick and easy!


Stamps:

Monday, February 20

La Femme


Carla has created two gorgeous cards with the La Femme set of digital stamps, one in shades of pink and the other in soft blues. Both are coloured with Polychromo pencils on white card and she has embellished with additional stamps, die cuts and patterned paper.


Stop by her blog for more details and inspiration!

Saturday, February 18

Tutorial - Extended Faux Step-Fold Card


This faux step-fold card gives you the same look as a centre step card but without all the measuring, cutting and folding. Easily made from a single sheet of cardstock (A4 or letter), and can be decorated with offcuts of your favourite patterned paper.


1. Trim the base card to 41/2" x 11" and the centre panel to 3" x 8". (It's not too difficult to alter the size of this card once you understand how it fits together.)


2. Place the base card horizontally on your score board and score at 41/2", 9" and 10". Fold, concertina style, along the scored lines.


3. Place the centre panel horizontally on your score board and score at 21/2". Fold along the score line pressing the crease firmly with your bone folder.


4. I prefer to decorate the pieces before assembly, but feel free to assemble the card first if you prefer. You'll need four pieces of patterned paper to decorate: 23/4" x 51/4" for the centre panel, two pieces measuring 3/4" x 41/4" for either side of the centre panel, and one piece measuring 3/4" x 41/4" for the bottom. (All paper will be vertical in orientation except for the bottom piece.)
NOTE: I also placed a piece of pink ribbon around the bottom of my centre panel before assembly.


5. Secure the centre panel to the middle of the bottom section of the base card. The adhesive should only be applied to the section before the first fold.


6. Fold the card flat and flip it over.


7. Apply adhesive to the back of the centre panel to secure it to the base card. Be mindful of where you place the glue as the centre panel is higher than the base card.


8. Now add whatever additional embellishments you'd like to complete your card.


Stamps: