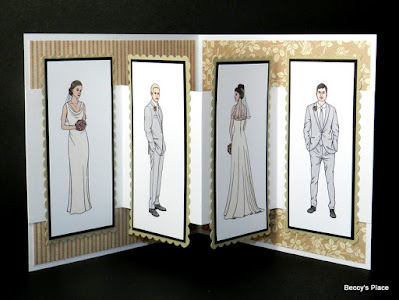
W-Fold cards may just be my new favourites... they're easy and fun to make and can be resized to fit whatever images you wish to use. And let's not forget how fabulous they look when standing up on display. They are perfect for showcasing multiple images, photos, sentiments or a combination of everything.
TEMPLATE
1. To create a card the same size as mine, you'll need one piece of cardstock measuring 10" x 5" for the base, and one piece measuring 10" x 3" for the inside panel. (If you'd like to make your card in a different size, just keep in mind that the panel needs to be the same width as the base card. The panel is divided into four equal portions, and each portion needs to be large enough to hold the image with room to spare on both sides.)
2. Score the card base at 5" and fold in half. Place the inside panel horizontally on your scoreboard and score at 21/2", 5" and 71/2", fold along each score line starting with a valley fold, then a mountain fold and finishing with a valley fold. The panel will resemble a "W" when sitting on your desk.
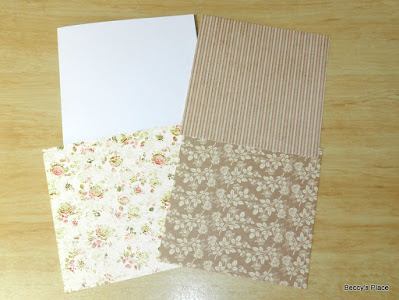
3. Trim three pieces of patterned paper to 43/4" square. Adhere one to the front of the card and the other two to the inside.
4. Add glue or double sided tape to the back of the first section of the panel (between the left-hand edge and the first score line). Secure the panel to the inside of the card, centred between the top and bottom edge and flush with the left-hand edge of the card. See the photo below.
5. Fold the panel until you expose the last section. Apply glue or double sided tape to the entire section and then close the card to secure the panel in place.
6. To decorate, prepare your images or sentiments on individual pieces of cardstock. I have layered three pieces to create my panels, with the finished size being 2" x 4". You must ensure that each of the images fit, width-wise, onto the sections of the panel with room to spare. In my case, my images are 1/2" narrower than the sections of the panel. For the best results, you want them to be longer than the panel so that they extend beyond the top and bottom edge. In my case, my images extend 1" beyond the top and bottom.
7. Use glue or double-sided tape to secure each image to the inside panel, taking care to apply the adhesive only where the image meets the panel.
9. Decorate the front of your card and you're done!
Stamps:


8 comments:
I like this fold Beccy. Doesn't look that difficult to do yet packs alot of punch. I look forward to giving this one a go - November if not before.
Fabulous card, Beccy! Jennifer. x
Gorgeous new collection and stunning card, hugs, Lori m
Hi Beccy this is a stunning card. I just love it. Have a good weekend. Take care. Hugs Jackie
Fabulous card and images-love the fold and definitely having a go at this one
Carol x
Wonderful card, love the shape. Anesha x
This is a fantastic fold and I found it really easy with your instructions. xx
Just found this brilliant tutorial for this card, am so pleased and grateful for your easy to follow video. Regards from UK 🇬🇧
Post a Comment