This is a pretty little card that folds up into a nice, tidy 4" square. It reminds me of the Japanese art of origami because of the folds required to create it, but fortunately it's not too complicated for those of us who could never quite line up our folds!
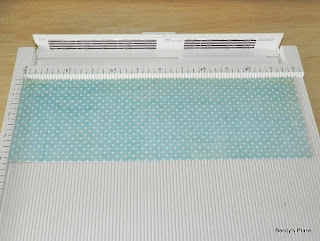
1. Start with a 12" x 4" piece of sturdy, double-sided, patterned paper. Cardstock really isn't suitable for this card as it's too heavy for the folds required.
2. Score the paper at 2" and 10", then crease firmly along the score lines.
3. Hold a ruler vertically along the mid-line of the paper, which is at 6". Fold the right hand side of the paper down along the ruler as shown in the picture below. Crease firmly.
4. Repeat for the left hand side, bringing the two edges together. Crease firmly.
5. Unfold the paper and turn it around on your score board so that the previous two creases now form a "V".
6. Repeat steps 3 and 4 pressing all the creases firmly.
7. Unfold your paper. You should have a number of intersecting creases that form a diamond shape in the centre of the card. Crease all of the folds again, one way and then the other (mountain then valley) so that you have plenty of movement in the creases.
8. On either side of the diamond you will notice several triangles. Hold the paper so that one of the ends is facing downward. Press your thumbs into the triangles and bring all of the creases together lining them up carefully. Press the folds firmly.
9. Repeat step 8 on the other end of the paper. Remember to press the creases firmly so the card holds it's shape.
10. All that's left is the decoration. I used a stamped image from Flourishes, an old corner stamp from my stash and a scallop edge punch to decorate my card. I then made a ribbon loop that slides on and off to hold the card closed (see the first image). Have fun!


15 comments:
Hi, Beccy! Thank you for the great step-by-step tutorial! I can hardly wait to try this!
Very pretty Beccy! Thanks for the awesome tutorial~
tres belle carte bravo bise raymonde
Thanks for the tutorial!!!
gr.LOuise
Beccy, thanks for this tutorial, I personally appreciate your generosity...luv aNNIe xx
Thank you Beccy for the great tutorial! I made a large card similar to this for my Granddaughters 18th birthday. Love this!
Pam
scrap-n-sewgranny.blogspot.com
Fantastic card and tutorial Beccy..loz
A lovely image, Beccy! A great tutorial and a beautiful card! Hugs, Lesley
Great card and tutorial too Beccy tfs. :)Viv xx
You make it look so easy, will to give this fold another try, I have only made one (out of many tries) that was useable :O)
hugs
Glenda
Gorgeous tutorial...thanks for the inspiration!
xxx Margreet
Thanks so much for posting this. I've been trying to figure out how to do this card. You make it look "easier" lol than I thought.
Great tutorial!!! Best card folding site I've found. Thank you for sharing all of these. You make lovely cards - I'm so inspired
Hello Beccy....Hoping you may be able to help me out here. I just love this card so much! I have made 6 of these as a Thank You. But, when I went to mail them, WOW! Being in the US & being they are square, I had to pay a lot extra to get them mailed. The cost was $3.50 ea!!! Of course, plus the paper & my time to make each one unique. I surely don't mind paying $1 more to mail as this type of card is special, but $3.50 is unreal. How can I make this card larger? I can't figure it out. I have tried but with no success. So thought I'd ask around for help/feedback. TY in advance & have a lovely day.
Hi Claire. I'm sorry to hear the cards cost you so much in postage, that sure is a big difference! Is there any way you could put the card in a standard envelope? Perhaps make a nice square envelope for the card itself, and then place that inside a larger one. I know a lot of people do that to get around problems with odd sizes.
As far as making the card bigger, the problem is in sourcing paper that is bigger than 12" x 12". You can't really have joins in this card because of all the folds. If you were able to find a bigger piece, you'd need to do some maths (ugh!) to figure out the ratios.
If you just wanted the finished card to be longer, say 6" x 4", then start with a 16" x 4" piece of card stock. For step 2, score the card at 4" and 12" so that you add the length to either end. Make the centre pieces the same as in the tutorial.
Personally I would just go with the bigger envelope, but it depends on what you want the card for. If you need more help Claire, please email me at beccy@beccysplace.com.
Good luck!
Cheers,
Beccy
Post a Comment