Colouring Technique
There are lots of different ways to colourise stamped or printed images, from paints and watercolour pencils to inks and markers. The technique that I want to share with you today is both cost effective and lots of fun!


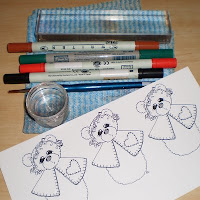
- a stamped or printed image - must be waterproof ink
(print or stamp on good quality flat white cardstock)
- absorbent cloth or paper towel
- a variety of water colour markers or felt tip pens
- small paint brush
- water container
- a non-absorbent surface (I use an acrylic block)
Technique:
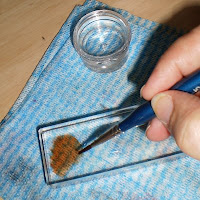
1. Scribble some colour on to your non-absorbent surface. I use an acrylic block because it is convenient and of a good size. You could also try a small piece of glass, a pallette pad, a sheet of acetate or even a plastic sleeve from a folder. It doesn't matter so long as the colour cannot be absorbed into the surface.
2. Allow some water to absorb into your paint brush, then add it to the colour on your acrylic block. You are watering down the ink to a much
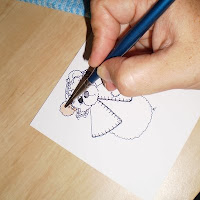 thinner, wetter consistency. Add as much or as little water as you wish depending on the depth of colour you want to achieve. Fill in the printed image as you would if painting. Try and work quickly as the colour will absorb and dry unevenly if it is allowed to sit for any length of time. If you have a particularly large area to colour it's a good idea to use a larger brush for quicker application.
3. When you add a shadow to an image it is generally done by applying a colour that is a darker
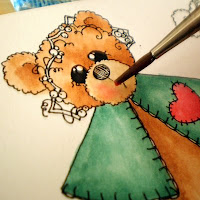 tone, but with this technique, we are applying shadows by increasing the depth or amount of colour in certain areas. Wash off your brush and apply enough clean water to make it moist but not dripping. Now you want to pick up the colour only on the very tip of your brush. Do this by swiping the tip of the brush gently through the colour.
4. Apply the colour at the darkest area of the image, which would be the outer edges. Lay the brush almost flat as you apply colour. The water
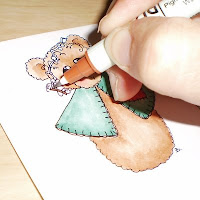 held further up the bristles will dilute the colour as it leaves the tip giving you a nice even, graduating shadow. If you are left with a very distinct line of colour, simply rinse the brush and gently apply some clean water over the area until the colour evens out. Be careful not to overwork it or the paper will start to disintergrate and come away.
5. Complete all the basic colour and shading. When applying darker areas think about the way the light hits an object leaving shadows on the
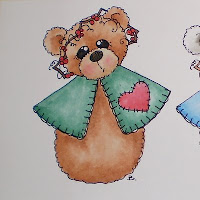 opposite side to the light source. We also have shadows in areas that recede such as eye sockets or under the edges of clothing and in folds of fabric.
6. Add a little colour to the cheeks of your bear by painting clean water on the area you wish to colour first. Apply diluted red or pink colour by gently touching the brush to the moistened cardstock. The colour will bleed into the moistened area. If the colour is too intense, simply wipe the excess water out of your brush and then touch the
 coloured area again. Your brush will soak up some of the liquid.
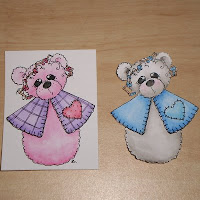
7. Feel free to add extra areas of detail with the pen applicator. This will allow you to get into those tight areas, increase the intensity of colour, or apply extra details as I have on the cape of the little pink bear.
8. When you are happy with the colouring of your image, allow it to dry and then use it as an embellishment on a card, off the page project or scrapbook layout. You can leave the image on the background of white cardstock, or you can cut around the image and apply it to a different background as I did with the little white bear wearing the blue cape.


8 comments:
absolutely gorgeous!!! wow, I just love those cards.
You have really, really good tutorials. Thanks for sharing your talent with us. Donna
Is it possible to change the font color of this tutorial? The black is hard to see against the brown background! I highlighted the text and made it white, but it is somewhat difficult to read...
Sorry about that! I've changed the font now to white so it should show up a lot better.
Cheers,
Beccy
Thank you so much for the freebies and the techniques!! They are all so helpful! I am glad I found your site!
I do not have a blog yet, just a scrapbook.com page under TtBugg, so have to sign anonymously, but still appreciate you!
I agree wholeheartedly with the coments above.Thank you very much
How do I find the tutorials? I am new. Thx.
I've updated the post now and changed the colour of the text... sorry about that!
Cheers,
Beccy
Post a Comment