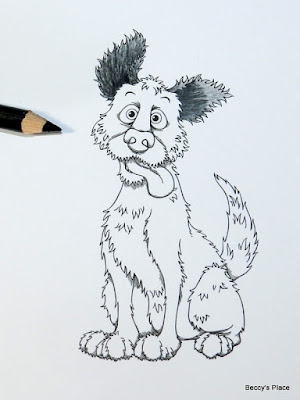
Today I want to show you how to colour the hair on a shaggy dog. In my example I've used black pencil, but you can switch it out for whatever colour you'd like your pooch to be.
1. Start by printing (or stamping) your image onto a piece of white cardstock, then begin adding the first layer of colour. It's important to colour in the direction of the hair growth, for example, the hair in his ears grows up toward the tip of the ear.
2. Now add in the darkest area of colour, which will be inside the ear. Again, make sure you follow the direction of hair growth. Keep your pencil quite sharp so that the individual strokes are visible.
3. Add more pencil strokes coming out from the darkest area. As you work outward, allow the strokes to become further apart so that "gaps" start to appear. These will naturally lighten the area.
4. As you get to the lightest area, apply less pressure to the pencil as well as keeping the strokes further apart.
5. Now apply a base layer of pencil to the face. In general, dog fur grows outward from the nose, so that's how you'll want to colour.
6. Add in the darkest areas of colour - around the eyes, which helps to sink them into the skull and prevent bulging, below the nose and around the back and bottom of the muzzle.
7. Now add in the mid strokes working through to the lightest pencil strokes at the top of the head and muzzle.
8. If you wish, you can use your black pencil to add more shading to the dark areas. You can do this in the traditional way or with short, dark lines. I've added more shading around his muzzle to help separate and distinguish it from the rest of the dog's head.
9. Add a light coat of pencil to the nose, then colour the nostrils black.
10. Shade from the bottom of the nose to about half way up, reducing the amount of pressure on the pencil so that the colour fades out. You don't want to use obvious pencil strokes on the nose as it has a smooth texture.
11. Complete the nose by shading in slightly from the top and each side. This will help to give the impression of shape. If you wish, you can add a little white pencil as a highlight.
12. Finish the dog's head by colouring his chin in the same manner as the rest of his fur.
13. Apply a layer of colour to the dog's body. (You can work in smaller stages if you prefer.) Remember to always follow the direction of the fur's growth, which is away from the head and toward the tail. The fur on the legs grows down toward the feet.
14. Add in the darkest areas and then work out toward the lighter sections.
15. Add additional shading where necessary, paying particular attention to areas that overlap.
16. Complete the image by colouring the eyes and tongue.
Digital Stamps:


Thank you very much Beccy, this is a very clear and helpfull tutorial for me. I'll save it to read it again sometimes.
ReplyDeleteWonderful Beccy, funny card!
ReplyDeleteSuper cool.
ReplyDeleteThanks for the tutorial Beccy.
This is so pretty and so adorable, anyone getting this card will have a big smile on their face, hugs, Lori m
ReplyDeleteGreat tutorial, thank you! Beautiful card and what a funny and cute dog!!
ReplyDeleteStunning colouring
ReplyDeletegreat tutorial! thank you!
ReplyDeletetoo cute, terrific coloring, thanks for sharing, animals are so hard for me to color
ReplyDelete