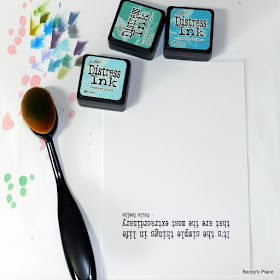
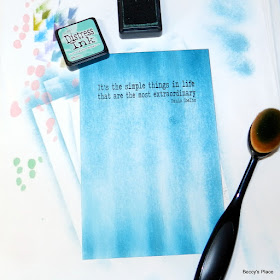
Silhouette stamps are perfect for crafters who love to create backgrounds. The solid figures, usually printed or stamped in black, are a beautiful contrast against a bright star-filled sky, a riot of colourful blossoms, or whatever background captures your imagination. Today I want to share a technique for creating an aurora using water-based inks and a blending brush.
I'm going to start by working the colour from the bottom to the top, which means I'll need to turn my cardstock 180 degrees to make it easier to add the colour. (Please forgive my messy scrap paper... I hope it's not too distracting as we progress through the tutorial.)
I'm dragging light blue ink (Tumbled Glass) from the edge of the cardstock to the top. For this effect, we don't want to over-blend too much... we're after a streaky look.
I'm adding a darker blue (Broken China) over the light blue in several places, again dragging from the edge of the cardstock to the top.
Now spin the cardstock all the way around and work from the top down. You want to add ink right across the top of the cardstock, taking care not to cover all the lighter blue at the bottom.
I'm introducing a touch of green now with a darker ink (Evergreen Bough). I'll deepen the darker blue, keeping most of the pigment at the top of the cardstock.
My final colour is a dark blue (Faded Jeans), which will be even darker when it's applied over the previous layers. Keep most of the colour at the top of the cardstock so it looks like the aurora is rising up from the ground or horizon line.
The last step is to add some stars with a white gel pen. You could flick white paint if you prefer, but I tend to go a little overboard with my flicking and end up with a definite paint spatter... hence the gel pen!
My background is ready to use.
Check back in a couple of days to see where it ends up.
Stamps:


Absolutely gorgeous card and fabulous sky,Kate x
ReplyDeleteBeautiful card! Enjoy your weekend,
ReplyDeleteColinda
Prachtig!!
ReplyDeleteFabulous, thanks for the tutorial. xx
ReplyDeleteGreat tutorial Beccy, thank you.
ReplyDeleteKeep safe and well.
Faith x
Great card and tutorial. Thank you.
ReplyDeleteGreat background and tutorial....thanks for sharing.
ReplyDeleteI love this...thanks for sharing how to do it.
ReplyDeleteThis is a very effective technique. I did an aroura background on Christmas cards last year. I used purple,pink,orange&blue.Overlapping the colors randomly. I used a finger blending tool & the result was pretty. This blending technique provides a dramatic background. I will try to attach a picture of my card
ReplyDeleteThanks for this demo.
Gorgeous!
ReplyDeleteBeautiful!
ReplyDeleteThank you! I much prefer a written tutorial!
ReplyDelete