Tuesday, April 29

All The Trucks

I have a fabulous square punch that makes deckled-edge shapes that can be layered side by side to look like tear sheets. I've used 20 of them as the background for this card, then layered pieces of patterned paper over the top to hold my images.


Products:

Sunday, April 27

Little Blue Wren

A simple card, created with layers of patterned paper and silver mirror card, a heat embossed sentiment, die cut bird, and some organza ribbon. The white spots are tiny drops of Nuvo paint.


Products:


Saturday, April 26

Layout - "Boyhood"

I actually spent some time creating a scrapbook layout today, but I think the design would also be great for a card... just on a smaller scale. I used a combination of the toned images from the Blue Wrens cut sheets plus torn strips of patterned paper to create a vintage-looking page. Some black Nuvo drops and pieces of twine add a little more texture and offer a nice contrast to all the straight lines.


Products:

Friday, April 25


They shall grow not old, as we that are left grow old: 
Age shall not weary them, nor the years condemn 
At the going down of the sun and in the morning 
We will remember them.
by Robert Laurence Binyon

Thursday, April 24

Layering Images


I have another quick idea to share with you today, using three of the big cement truck images from The Long Haul cut sheets. By layering parts of the image together, similar to paper tole, you can get a wonderful 3D-look that pops right off your card!


1. You'll need three or more of the same image.


2. Use a pair of small scissors to cut out the details. Keep one full image as the base to build on, then cut out layers until you're left with the section of the image that is at the forefront. For me, that is the cab of the concrete mixer.


3. In traditional paper tole, the layers are secured together with silicone glue, but I've used small pieces of thin chipboard to build up my design. Lay the chipboard (or foam tape) on the back of the second image piece then secure over the truck base. Give it a moment to dry, then repeat for the top layer, which in my case is the cab.


For even more dimension, you can use two or three additional images to create more intricate layers. For example, you could add the wheels as a separate layer.

Products:

Tuesday, April 22

Same But Different

Two different cards, one design... which do you prefer?
I go back and forth between the two styles. Sometimes the busy, colourful look of the first card appeals to me more, but other times I prefer the simpler, white background of the second. Is it our mood that affects the choice or is it the colour that affects our preference?


Products:


Sunday, April 20

Christmas in April

The little trucks from The Long Haul set are perfect for creating different occasion cards. The tray of the truck can be filled with red and pink hearts for Valentine's Day, candles for birthdays, or in this case, a big pine tree for Christmas!


Products:

Friday, April 18

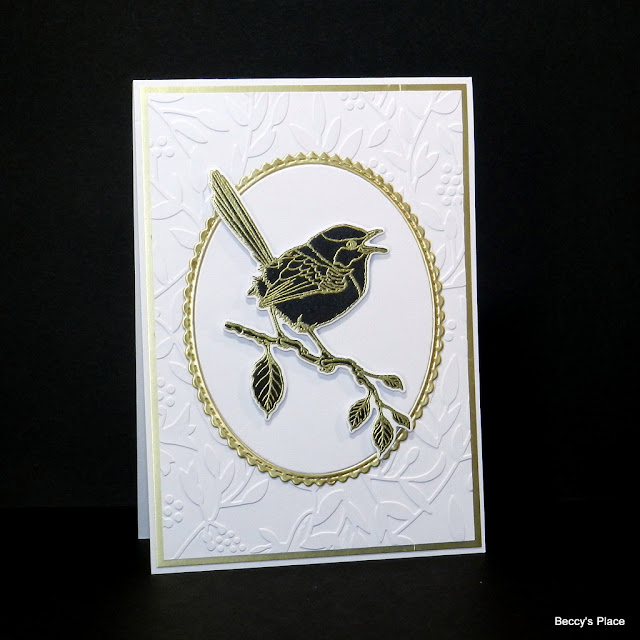
Tutorial - Embossed Silhouettes


Back in January, I shared a tutorial about heat embossing on the coloured, cut sheet images. That same technique can be applied to the silhouette images from the Blue Wrens cut sheets, giving you beautiful results that would look wonderful on wedding or anniversary cards.


1. Secure the die cut silhouette image to your stamping platform with a small piece of double sided tape or repositionable glue. Don't add too much or you will have trouble lifting the image from the platform.


2. Carefully position your stamp over the silhouette image, lining up the edges as best you can. It helps to have a very clean stamp so you can see through to the image underneath.


3. Use an embossing buddy on your image before stamping with versa mark ink. Apply your embossing powder as normal, then set with a heat gun.


Combine the image with matching mirror card and crisp white cardstock for beautiful results.


Products:


Tuesday, April 15

Wishing You A Beautiful Day

Nesting dies are very handy for creating beautiful dimensional frames, and you can make them with whatever shaped dies you have. Just add some foam tape or off cuts of chipboard between the layers to give the extra dimension.


Products: