Sunday, June 15

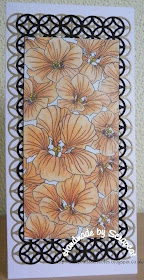
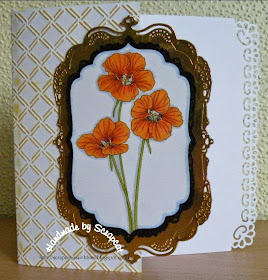
New Release: Nasturtium Set

I love to see these funny little flowers growing in the garden.  They are always bright and cheerful and grow happily around the wood pile, along the fence or up against the shed.  They aren't too fussy about where they are, as long as they have some sunshine and a little drop of water from time to time.
This set includes seven sentiments, three black and white line drawings and pre-coloured versions of each.
 

Carla's Card

Two cards from Annie

Shirley's Card

Kati's Card

Ileana's Card

Three cards from Tracy
 
Jill Jacobsen from Shared Inspiration, created this lovely card showcasing one of the sentiments in the set along with the three individual blooms.
 

Thursday, June 12

Tutorial - Pop Up Card I


My friend Penny taught me how to make these pop-up cards several years ago at a Christmas make-and-take at our stamping club.  They work beautifully with fussy cut images or die cuts, and can be customised to whatever theme or occasion you wish.
 
 
1.  You will need two card blanks (any size) plus the images or die cuts you wish to "pop-up" in the centre of the card.  I've chosen to use three little owls from my Owlette set that I coloured and cut out.  Make sure your three images fit side by side in the centre of your card without any over hang.

2.  Score and fold one of the card blanks in half.  With the fold closest to you, mark and measure three evenly spaced tabs.  These tabs will hold your images and form the "pop-up part" of the card.

3.  My tabs are 1/2" wide and 1/2" tall.  I started by centring the first tab right in the middle of my card blank, equal distance from both edges.  I then marked each of the two side tabs equally distant from the centre tab.  The distance you place the tabs apart will depend on the size of your card blank and the size of the images or die cuts you are using.

4.  Use a knife or sharp scissors to cut along the vertical lines (I've marked them as "cut" in the photo).  When you open your card you will see the cuts have gone through both sides with the centre fold in the middle.  Now score along the tops of the tabs so they fold easily.  See the picture below.

5.  On the inside of the card, pull up the tabs so they fold in the opposite way to the rest of the card.  These tabs will hold your images or die cuts.  (You can adjust how far your pop-ups will protrude by altering the measurements of the cuts.  Because I cut my tabs at 1/2", my little owls will stand 1/2" away from the back of the card.  If I wanted to have them further away from the card I would make the measurement longer.  You can play around with the measurements and have items further forward than others by making some tabs longer and some shorter.)

6.  Secure your images to the bottom section only of the tab.  I used some strong glue to hold my little owls in place.

Your pop-ups are now done!  They will fold down when the card closes, and pop up when it opens.

7.  Take the second card blank and cut it in half.  Adhere one of the pieces to the back of the card to cover the cuts and folds.  Be sure you don't get any adhesive on the tabs or your pop-ups won't pop up!

8.  Decorate the other half of the card blank and adhere to the front of your card, again covering the cuts and folds.  (Alternatively, you could keep the second card blank in one piece and simply adhere the two cards together.  You will need to make some slight adjustments to the length of the inside card so it fits neatly and also ensure there is enough movement in the spine.)

9.  Finish your card by decorating the inside as desired.

Sunday, June 8

New Release: Gerbera Set

Gerberas are fabulous flowers that come in a rich and varied palette of gorgeous colours, making them the perfect subject for card makers.  They look great coloured with alcohol markers because of the beautiful vibrant pigments, but you can also get great results with pencils or watercolour inks.  This set includes five black and white line drawings plus the pre-coloured versions for quick card making, as well as seven sentiments to print and use along with the images.
 
 
Beccy's Card

Shirley's Card

Annie's Card

Carla's Card

Kati's Card

Three cards by Ileana
(Guest Designer)
 
Tracy's Card
(Guest Designer)
 

Friday, June 6

Beautiful Ride

Just a quick card share from me today.
The image and sentiment is from my Bicycle Set, which I stamped on watercolour paper and then coloured with distress markers and a water brush.  The little flowers were made with punches and some liquid pearls for the centres.
 

Wednesday, June 4

Freebie: Birthday Stanley

This month's Stanley set is a freebie!
Right click on the images below and choose "Save Picture As" to save them to your computer.  To use an image, copy and paste it into MS Word or open in it your favourite photo-editing software.  You can change the size, orientation or colour, then print and use it on your project.


Here's the set.  Enjoy!


Monday, June 2

Shared Inspiration by Jill Jacobsen

The lovely Jill Jacobsen, who many of you would know from Sparkle N Sprinkle, has started up her very own digital store!  She will be selling her own line of digital stamps and background papers, as well as offering in-store classes at Sparkle N Sprinkle for those who live locally.
 
As an introductory gift, Jill is offering her very first digital image free of charge, but you'd better get in quick before the offer ends!  Click the link below to visit her site and snag her fabulous freebie.
 
 
You can get notifications from Jill by signing up as a Follower on her site,
subscribing by email or connecting with her on Facebook.

Sunday, June 1

May Challenge Winners

Congratulations to Sewes, Viv and Cass!
You are the randomly chosen winners of the May challenge.
Please visit my online store and select either a full digital stamp set or three individual images.  Email your choice to me at beccymuir@yahoo.com.  Thank you to everyone who played along last month, I hope you'll join in again for the next challenge.

June New Releases

I felt like using lots of lovely bright colours this month so went with some wonderful old world flowers that really know how to put on a display.  Both gerberas and nasturtiums always flourished in my grandmother's garden.  I must admit that the nasturtiums grew wildly around her old shed, but that didn't mean they were any less charming.


This month's Stanley set is actually a freebie... or will be in a few days time.  Check back in on Wednesday to snag the new set for your library and to see what my wonderful designers have created with it.